I am hoping to go sailing tomorrow. I am just watching the forecast. Not so much the winds but the rain. Our "10% chance of rain" today turned out to be constant, persistent mizzle and drizzle. That horrible penetrating stuff that all mountaineers detest. It isn't torrential. You can almost deal with that. It is the mizzle stuff - the fine drizzle that just permeates everything, irrespective of however waterproof things are supposed to be. Today has been awful with it; that and fog of all things.
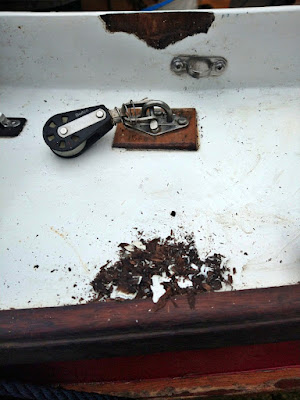
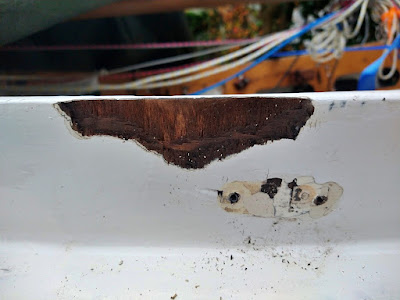
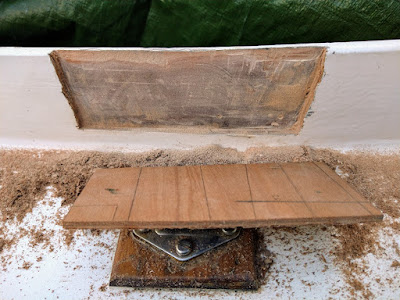
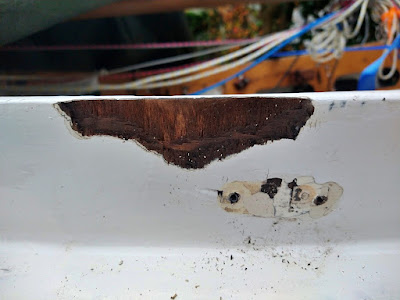
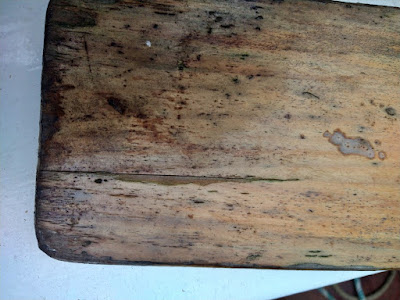
Anyway, as I was preparing to reload Arwen with all her gear, I accidently knocked against her coaming with one of the oars and to my horror, a piece just fell away. Quick examination and I discovered delamination and some wet rot.
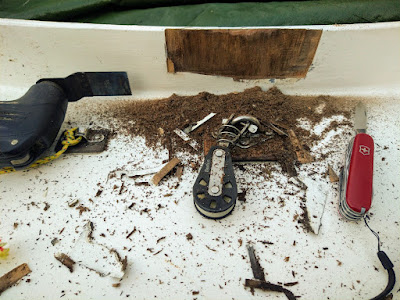
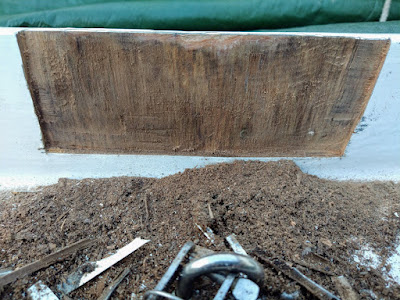
Its about a 7cm long section although I expect that further investigation will show
it to be around 11 cm log and four centimetres deep to deck top
This is the first time in over twelve years of Arwen being left under a tarp on the driveway in all weathers, that I have ever discovered wet rot on her and I am shocked and somewhat embarrassed. I dont know how I missed it. I always religiously inspect her for damage every time I pack her away at the slipway after a sailing session. I'm quick to touch up scratches and dings with three layers of paint. Now, admittedly, last year I only went out sailing four times in her due to the pandemic lockdowns and then because we were travelling away during the summertime on many occasions. But even so!
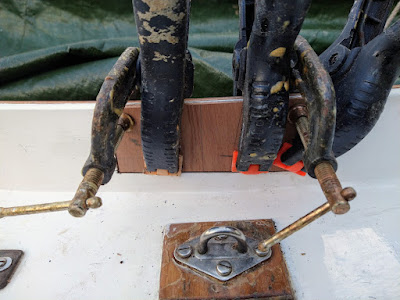
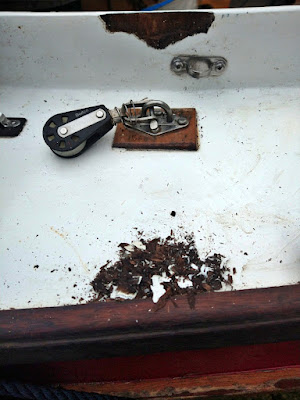
The other bit of damage occurred when I removed a deck eye
as part of my 'inspection' of the damp damage
No excuses. I missed a hairline crack on the coaming top and am paying the price for my lack of diligence.
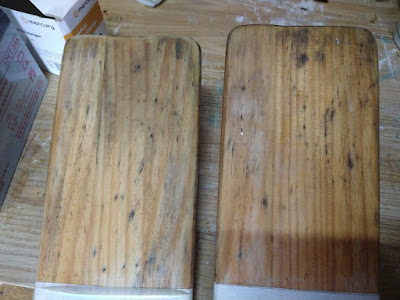
I also got another surprise. Between August and now, one of the oar blades has developed a crack. Now they were already on the winter maintenance list - a strip down and re-varnish, but I am surprised how quickly it has happened. They were a donation to me and are around 12" too short in length to be effective.
These need a sand down and further inspection but the split is obvious along a former glue line.
I did build a new set of longer length oars but discovered when first using them that I was going to have to adjust the oarlock positions and seated rowing position to use them more effectively, hence I carry these older ones for now. A temporary solution. (One of my ambitions for 2022 is to actually learn how to scull).
So, to the repairs.
My initial thoughts with the coaming was that I would have to cut out the effected area and then laminate in a new piece of ply coaming. Now I always think it is a good thing to know well your limitations. So, I immediately went to the JW forum and Howard Rice rode to my rescue. Not the first time he's done that for me, bless him. A generous soul.
The oar blade is simple - pry the split apart very gently to ensure the wood is dry. Then mix some epoxy and use a kids little paint brush to get it into the gaps to wet the sides. Mix a little thickened epoxy and squeeze that into the gap before clamping the blade together. Remove any excess squeezed out and when hardened sand lightly.
Howard also suggested I glass the oar blades with 6 oz glass, or at the very least do the blade tips and then perhaps paint the blades a complimentary colour. I could use the rustic red - which is the colour of her sheer plank.
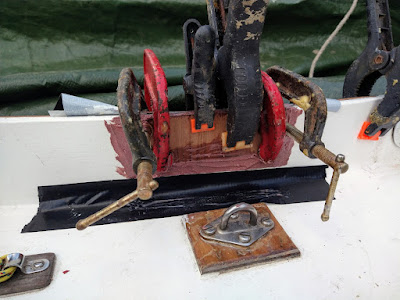
As for the coaming section - Howard's recommended advice, endorsed by others, seems to be:
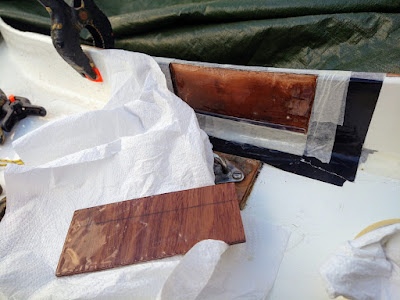
- use a sharp blade to enlarge the soft area and area where paint is coming off until I reach dry, solid wood. less taken off is better i.e. stop as soon as solid wood is reached
- dry the area with a lamp or heat source - SWMBO has a very nice hairdryer - although I suspect standing there with it for an hour or two is impractical - so lamp it is
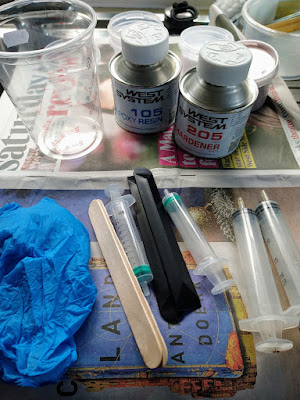
- mix up some unthickened epoxy and wet out the dry wood
- mix remaining mixture with wood flour to thicken and use plastic squeegee to spread it evenly over the surface - fairing it in with the surrounding surface. I suspect I will have to build it up in layers, allowing each one to dry out first.
- once the required depth has been done and faired in, block and sandpaper gently to fair all surfaces. i could use West epoxy fairing compound mix - I have some left on one of the shelves - for that final top layer
- After it is dry - it will be painting - three coats aluminium flake paint, three of pre-kote and then three of international Toplac gloss coat. Up until now this combination of nine coats has been pretty much bomb proof on Arwen. even on high roller wear areas of her hull, I have never been through the alu flake layers.
Over the next couple of weeks, I will look for any other hairline fractures and gently fill them with mixed epoxy before sanding and painting them over.
In the spring, when we get a good spell of dry warmish weather, I'm wondering if I could design some temporary, simple, poly tarp tunnel affair out of water piping, wooden timber joists and cheap tarp - just to put over Arwen when I have painted her. It would allow air flow through but keep off the dust, leaves and moisture.
Wish I knew someone local who has a large covered, empty space available for a fortnight! In the meantime, here is an example of the power of FaceBook for something good....
My thanks to Howard and Ben and all the others who contributed similar tips. Much appreciated, and of course, I will post any repair details here.
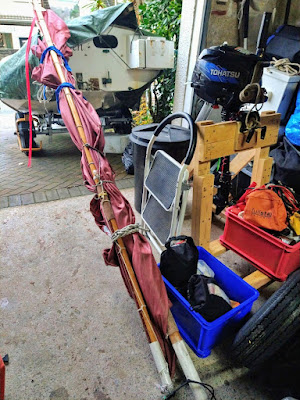
After finding these maintenance issues, I then inspected the spars and mast and all seems fine with these. I took the opportunity to adjust the lacing of the sail to the top yard. Several people last year, including a sail maker at Jeckells, observed that a possible cause of the diagonal crease I get from the bottom of the top yard to the clew on the sprit boom might be due to too much tension in the top lacing to the top yard. So I loosened it and readjusted its position on the yard. I also moved the tie on ring on the top yard a little so that it falls 35% of the way back up the yard. Hopefully this will help as well.
Its all checked and ready to load back into Arwen
Over the last few years I have carried two anchors even on day sails. One is an 8lb Danforth with four metres of chain. The other is a donated hefty Bruce weighing 15lbs with five metres of chain. Overkill I suspect. This latter anchor is a nightmare to stow aboard Arwen. I keep it in a tray on the floor forward of the centre thwart - it is strapped in and held in place but I keep tripping over it and/or grazing my chins on the damn thing.
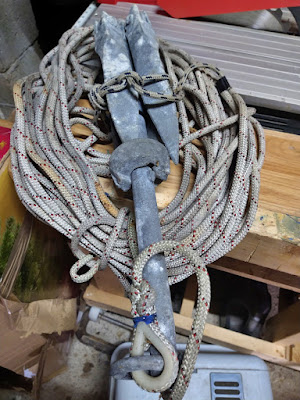
This donated grapnel anchor (10 lbs) may prove useful as the occasional 'stern anchor' when camp cruising and I will return my danforth to the main anchor for a temporary trial this coming season. Thus far, it has never let me down, even in strong tidal flow areas. I know a grapnel should never be used as the main anchor but for picnic stops or stern line - it should prove useful.
Normally I stow the danforth in a tray on the floor on the cockpit floor forward of the centre thwart on the port side. The warp end is run outside of the shroud plates and through a bow cleat before being tied off on the samson post (is that the right term - it doesn't feel right - but I can't remember what the correct term is - poor old memory worsens more rapidly by the month but hey ho there we go).
I know that many navigator owners store their anchor and warp in the well on the starboard side. That is the same side that my outboard is mounted (on the stern) so I have often wondered whether I would cause a trim problem by doing this - hence its port storage site. More things to ponder!
Now big decision, should I be brave and go out tomorrow in what will be light-ish winds, foggy murk and lots of persistent drizzle OR should I be sensible and go to the chandlers to get some new epoxy supplies and start thinking about these repairs?
OR, I could just go and launch and retrieve Arwen a few times until I get used to the new trailer (which I haven't dipped in the sea yet) and then go to the chandler afterwards!
Thank you to all those who gave advice - deeply appreciated as always. If you have any further thoughts, please do drop me a comment below. In the meantime, I wish you and your families a Merry Christmas and Happy New Year in what I know are, for many of you, difficult and trying circumstances. Please stay safe and well.
Steve