Arwen's meanderings

Hi everyone and welcome to my dinghy cruising blog about my John Welsford designed 'navigator' named Arwen. Built over three years, Arwen was launched in August 2007. She is a standing lug yawl 14' 6" in length. This blog records our dinghy cruising voyages together around the coastal waters of SW England.
Arwen has an associated YouTube channel so visit www.YouTube.com/c/plymouthwelshboy to find our most recent cruises and click subscribe.
On this blog you will find posts about dinghy cruising locations, accounts of our voyages, maintenance tips and 'How to's' ranging from rigging standing lug sails and building galley boxes to using 'anchor buddies' and creating 'pilotage notes'. I hope you find something that inspires you to get out on the water in your boat. Drop us a comment and happy sailing.
Steve and Arwen

Wednesday 29 May 2019

The latest I have ever done a first launch

I cannot get over how this is the longest into a new year I have gone without doing another sail. I did my first launch of the year in mid January and I would have normally done a few day sail trips by Easter but for various reasons, my second launch of the year has been a long time in arriving.

There are a number of reasons why this has happened - a new electric bike being one of them and then some trips in 'Florrie' our touring caravan; trips home to see family as well. It all adds up.

Anyway, yesterday was a spur of the moment decision - high tide at 0915 4.8m. Winds were SW/WSW 8 - 11 knots with occasional gusts around 14 knots. Hazy sunshine and variable cloud cover. It was warm in the sunshine but less so when the clouds covered the sun.

There were no firm plans for the day, just a mooch across to Cawsand Bay and some sailing up and down the breakwater. I decided to do some setting sails so that Arwen would sail herself on a close and broad reach which she did admirably. I am always amazed at how steady she holds her course when the respective sails are balanced. The tiller and main sheet can be locked off in steady breezes and as long as I don't move around too much to upset trim and balance, Arwen will hold a steady course over a mile or two with no problem.

And so it was a pleasant hour passed in such endeavours; lining up a point and transit on one of the Sounds west or east shore lines and then balancing sails and seeing how well she tracked on her heading.

And all this was achieved with a malfunctioning jib.  I guess it was a lesson in seamanship - check that everything works before you leave the launch site and don't just assume it will. The Barton Furler has never failed to deploy in the nine years I have been using it but this time the line on the spool jammed somehow. Arwen's bowsprit is not one that will support my ample weight and so there was no shimming along it to manipulate the furler. The jib unfurled part way and that was it. It wouldn't budge - no furler whatsoever. So I sailed with half a jib and at the end of the day, released the entire jib sheet to drop the sail in to the boat. Arwen tacked just fine.

Some heaving to took place to add in a new reefing line. With tiller locked to leeward, jib backed, centreboard raised, main sail let out fully to leeward and mizzen tightened up, Arwen sort of drifted sideways and forwards at a slow speed giving me time to tidy her up, change video camera batteries and do some other bits and pieces.

Careful examination of Arwen during launch and retrieval has shown some maintenance is required. The lower rub rails are showing black staining and odd tiny patches of softer wood - so some sanding and resealing are required urgently. Patches of grey are showing on the hull bottom where the plastic rigid rollers of the trailer have taken their toll. Thank heavens Arwen has a fibre glassed hull bottom with five coats of aluminium flake paint, 4 coats of pre-kote undercoat and three coats of international Toplac. Bomb proof - well so far - touch wood.

It was good to see the main sail set properly as well. The new tack parrel bead arrangement at mast base along with new downhaul system and a new arrangement for tying top yard closer to mast means that the dreaded creases are almost all gone. The new snotter arrangement which leads back to aft cockpit means the boom can have finer adjustments during the sail.  Pity it has taken me so long to work out this aspect of sail setting!

And so to plans for this season. Priority one is to finish the Salcombe cruise series of videos with overnights up at Kingsbridge, South Pool and Frogmore Creek.  Then I want to join the DCA (Dinghy Cruising Association) July rally down at Falmouth. I'm thinking of actually sailing down there and back with stop offs at Fowey and Mevagissy.   This year I'd like to sail up the Fowey to Lostwithiel and a nice trip around the coast from Plymouth to Dartmouth and up the Dart to Totnes would be fun as well. There is a DCA rally up the Dart in mid June but as yet for various reasons I am not sure I can yet make that one.

I will have to dig out my Day Skipper coastal passage planning notes as I can never remember the chart work bit and how to calculate tidal streams, tidal drift etc. My brain needs a little bit of exercise.

Hopefully by July my new oars will be finished. 9' 6" they are a work in progress and will have a workman like finish! Basically painted blades and square upper loom section. Mid loom will be varnished and the handles left bare. I'm not quite sure how to reinforce the blade tips yet - I do have some fibreglass tape left over from another project so I suppose I could use that.  I will need to scrounge some leather from somewhere for the loom protection as well. The waxed thread I have plenty of.

A video diary of this day sail will be forthcoming shortly........I will keep you posted. 

Friday 24 May 2019

How to get good photographs of boats sailing on the water


How to get good photographs of boats sailing on the water
Frustrated with not having any decent photographs of my Welsford navigator ‘Arwen’, I signed up for a beginner’s digital photography course. In this, the second blog post, I share some further tips for taking good photographs of boats whilst at sea and try to work out how to get a perfect ‘under sail’ shot of my own boat! Blog post one was last week - access it in the menu on the right hand side of this blog post or here 

https://arwensmeanderings.blogspot.com/2019/05/getting-great-photographs-of-boats.html

So following on from last blog post:

1.       Think about camera settings before your trip


Some pre-thought about camera settings is very important. If you want the best possible quality photographs for inclusion in a magazine or to enlarge as prints of 8” x 10” or above, then shoot and save images in RAW format but expect lots of post editing in a photo editing software program afterwards. If you want photos for a personal album, a blog or an ‘Instagram’ post, JPEG’s are perfectly fine and take up less room on your memory card. My DSLR and compact camera can shoot both simultaneously.

Select the maximum image quality or megapixel resolution menu settings on your camera to enable large photo printing and allow any potential magazine art editors better photo editing options. Resist the temptation to digitally auto enhance any images you take for magazines. Let editors do it as they know what they are looking for and what will best fit their page layouts.

Good pictures can be obtained with your camera on auto setting as it selects the optimal exposure, shutter, aperture and ISO speeds. However, I like to exert greater control over exposure and focus in an effort to really boost image quality and detail, and so I have been familiarising myself with manual, shutter and aperture modes on my camera dial. It is not within the scope of this article to give detailed advice about camera settings but getting off ‘auto’ is fun and there are plenty of YouTube tutorials explaining how to adjust shutter and ISO speed, aperture and exposure compensation.

To capture images of boats sailing, set ISO speed between 100 – 400. ISO is how sensitive the camera is to light. For example, on bright sunny days choose a low ISO around 100 because you have plenty of available light. On an overcast day, you might set it to 400. Don’t go higher though as this will lead to a ‘grainy’ picture and that is something you want to avoid.

Shutter speeds above 1/250 second or above seem favoured initial settings amongst some experienced photographers I know. To freeze frame that bow wave so you get every single water droplet frozen will require shutter speeds of 1/2000+. Use aperture priority mode and turn up ISO speed or use shutter priority mode, select the speed you want and let the camera automatically set appropriate aperture and ISO.

If you want that ‘looking along the length of the boat’ shot to be in focus from foreground to background then you need a big depth of field so select aperture priority mode on the control dial and set depth of field between f16 - F22. The bigger the f/number, the bigger the depth of field. The camera will automatically set shutter speed and ISO appropriate for the day’s conditions. If I wanted just the boat’s foreground in focus but the background blurred, I need a small depth of field apertures of f8 or below.  A good general shooting setting for reasonable depth of detail across your image is f8 - f16.

Keep lens auto focus and image stabilisation switched on. If you want to keep the moving boat permanently in focus switch your camera auto focus mode from ‘One shot’ (or AF-S) to ‘Servo’ (or AF-C) and this will allow you to half press your shutter button to continually focus on the approaching boat until you are ready to take the shot.

I set white balance to auto when saving RAW images as I can alter them in most post editing software programs and if truth be known, trying to remember to manually set up my camera for the correct white balance every time I take a shot is beyond my limited brain capacity. My friend, saves in JPEG’s, and chooses a white balance option mode from his camera menu, suited to the conditions on the day - bright sunlight or cloudy skies.  Remember out on the water, the sky, water, sails and hull may be over bright so familiarise yourself with how to alter your exposure compensation if using a DSLR. When your camera’s light meter reads ‘0’, then exposure is correct. +1 means the image is over exposed (too bright) by one stop. Conversely, -1 on the meter tells you that your image is under exposed (too dark) by one stop.

If you have worn polarising sunglasses at the seaside, you know that glare disappears, and in clear water, you can see the sandy bottom, the seaweed and scuttling crabs with startling clarity. The polarising filter on your lens achieves the same thing, reducing glare and intensifying the blues and greens in the scene. Be aware that the filter will often reduce the light entering the lens and so if shooting in aperture priority mode, your camera will slow shutter speed slightly to compensate for this. To ensure you get that ‘freeze the water’ shot remember to raise your ISO a little higher.

Oh, and one more thing, turn off any date, time or GPS location stamps that might imprint on the final image. An irritating way to spoil a perfect shot!


2.       When ‘shooting’ day arrives……..

On photographic shoot day, armed with correctly set equipment and shot lists, we will ensure our boats are tidy and clean and looking their best. So many of the photos my friend took of my boat last year were rejected because I’d forgotten to take in fenders on the starboard side or allowed strands of reefing line and snotter control halyards to dangle across my face. Worst was my display of poor seamanship skills, through a sail with a huge clew to throat crease. So, no baggy sails, no loose lines, no cluttered cockpits and no dragging fenders – just a tidy, clean, boat displaying a good turn of speed, full sails and water flowing serenely along its hull.

My planned ‘shots’ list will guide my shoot but I won’t stick rigidly to it. I will develop situational awareness from the start by sitting back a while before shooting and taking a look around the sail area, looking for those unusual shooting angles as the boat sails around me.  I will try to anticipate what boat and helms-person might do on different reaches and tacks and also look for those unscripted interactions between my friend and his boat which show his sheer joy in sailing his own boat. Some images of him intently engaged in ‘action’ such as raising a sail, commencing a tack or furling a jib will capture ‘movement’ that conveys the sense of a boat being ‘under way’.


3.       A well composed photograph

A well composed photo, through its positioning of key elements and lighting tells the viewer a story about the scene, drawing his or her eye to the centre of attention, namely the boat.  It is tricky to get right but switching on the nine rectangles ‘rule of third’s’ grid in my rear screen and viewfinder helps enormously. It is an easy way of creating that balanced and visually interesting picture. The grid breaks up the image into thirds vertically and horizontally with imaginary grid lines. Horizons placed close to either the top or lower horizontal line, masts aligned on one of the two vertical lines and objects of interest located on one of the four intersection points between vertical and horizontal lines, make for visually more interesting pictures. 

Before pressing the shutter, assess whether you have balanced the amount of water, boat and sky in the image and try to include lots of ‘air space’ around the boat for later post edit cropping. ‘Tight cropping’ on the boat will lead to distortion of hull shape. Check you haven’t cut off part of the bowsprit or hidden the helm behind the boom. Getting all of the mast in shot is notoriously difficult so aim to get just enough in the image so that a viewer can work out what the sail rig is. Wonky horizons distract a viewer, drawing their gaze away from your fabulous boat, so check it is straight.


4.       Think ‘safety’

And lastly, a plea about safety. Even in an anchored boat, it’s one hand for yourself and one hand for the boat. Keep your camera on a short neck strap so if need be, you can quickly let it go to use two hands for safety. Try to shoot from a seated position so there is less chance of slipping or being a MOB casualty and wear appropriate grippy footwear – deck shoes or yacht boots.  With suitable clothing and sunscreen for the day easy to hand, always wear your life jacket or PFD as well.


Now armed with all this new planning and basic photography skill, my next planned photo shoot of each other’s boats, later this year, should go more smoothly and have a far greater success rate than last year’s effort. Well that’s the theory anyway! 

If you found this blog article useful, you can access the part one from the right hand side menu. if you are interested in creating sailing videos for YouTube then this first article also lists at the end my three blog posts about creating good sailing videos. 

If you have any tips for improving our chances of getting some good photographs of our boats under sail, then please share them in the comments box below. 

Similar blog posts about creating sailing videos can be found as a list of web addresses in the first article on photographing boats 

 Many thanks for stopping by. 

Sunday 19 May 2019

Getting great photographs of boats under sail


How to get good photographs of boats sailing on the water
Frustrated with not having any decent photographs of my Welsford navigator ‘Arwen’, I signed up for a beginner’s digital photography course and now over two blog posts, I share some tips for taking good photographs of boats whilst at sea and try to work out how to get a perfect ‘under sail’ shot of my own boat!

A boat under full sail, the skipper leaning on his coaming gazing intently at his well-set sails, the small bow splash water droplets freeze framed in minute detail against blue skies and verdant green creek-side reed beds.  
I am very envious of people who possess such stunning photographs of their beautiful boats and long for some similar pictures of ‘Arwen, my John Welsford designed ‘navigator. But alas, I have nothing but boring static shots of cockpit interiors and a vexing conundrum.  How, exactly do you get such lovely images of your own boat under sail if you sail single handed and more often than not without the company of other boats?

Safely flying my photographic drone whilst simultaneously helming Arwen has proved impossible. A non- photographer friend on a jetty got only distant grainy shots. A boat owning friend and I tried to get shots of each other sailing our boat's last summer but results were variable - cluttered backgrounds, fuzzy focus, poorly exposed. The ‘spray and pray’ approach to photography resulted in few images of reasonable compositional quality. Even in light winds it proved almost impossible to get truly decent photos whilst simultaneously helming our respective vessel’s safely.

So, are we are being unrealistic in trying to pursue that one ‘classic’ shot to put on our respective study walls? Well, we are nothing if not tenaciously ambitious and so, as a very 'novice' photographer, I have think been rethinking ‘photographic shoot’ strategies for this coming season. 


A second person in a boat to take the photos was a good idea, but sadly, there were no takers in some local photographic clubs I approached. Photos of boats with blue skies, bright colours and lots of varnish work, yes please, so long as they are on a pontoon, dried out in a harbour or moored within reasonable telephoto lens distance of the shore. Donning a life jacket and bobbing about trying to take photos and transferring between two different boats? Er, no thank you! The one photographer I did find wanted an exorbitant fee beyond my means. So, plan A went down in flames!

Plan B involves taking better shots from within the cockpit whilst out sailing and I realise I need to get to grip with my GoPro Hero 5. It is capable of taking some stunning photographs and thus far I have only exploited its video capabilities. So, some reading to be done and I will post my findings at a later date.  Still doesn’t get my ‘at sea under sail distant shot’ though.

Which leaves plan C. Boat owning friend and I find a nice quiet spot of sheltered water with uncluttered backgrounds, take it in turns to anchor our own boat and the other person then sails his boat in circles around the anchored vessel, whilst its skipper takes photographs. It’s a good plan, an anchored boat will be more stable and we could sail quite close to it so needing only small zoom lenses.  Having upped our photographic skills as well, we should have a better chance of gaining useable high-quality photos and with some knowledge of how a sail boat behaves in different weather and tidal conditions, each of us should be able to proactively anticipate some good angled shots as well!

So, based on what I have learned thus far, here are some tips for shooting from a stable anchored boat. Other tips will be in a follow up post next week.


  1. 1.Pre-shoot thinking

Pre-planning a photographic shoot significantly increases your chances of obtaining high quality, compositionally stunning images. Think about exactly why you want photographs of your boat sailing and what the ‘essential essence’ of the boat is that you want conveyed in images.  Are you going for ‘mood’ or ‘action’ because it will dictate what lenses you use and what time of day you shoot in.  Photographs taken for magazines or your walls, for example, will differ in requirements to those taken for your social media or blog sites, so some thinking about ‘audience’ is needed.

  1. 2.Composing a ‘shots’ list

My photographic tutor made us research different photographers and their styles. We learned loads and became inspired novices! So, seek inspiration from Instagram, Facebook and various sailing journalism websites. Classic sailing shots of boats – from astern the transom lee corner, on a collision course with an approaching bow, from the leeward beam whilst on a reach. All give great views of decks, crew, helms-person, sails and rigging. Bow splashes, spray and a helms-person peering from under a sail create a sense of the dramatic. Drifting sail boat photos, with back lit silhouette shadows of crew through white sails and rippled clear reflections of the boat in mirror calm seas are stunning.

In addition to the inspiring ‘big picture’ ideas for a shot list beforehand, don’t forget the close-up ‘story-telling - water droplets on a finely varnished piece of woodwork or the seaweed covered moused shackle between muddy anchor and chain. Remember, think ‘Big picture- little picture’ for your shots lists.


  1. 3.Location and timing is everything – apparently!

After gaining inspiration, think ‘Golden hour’ - the couple of hours after sunrise or before sunset - when winds are less, watery boat reflections more sharply defined and nature’s colour balance is warmer. Midday shoots with sun directly overhead give harsher, colder light and contrasty shadows in your images that hide the finer details of your beautiful boat. Of course, if you seek ‘spray over deck’ shots, then go when tide, wind and wave conditions are best.

A quiet water area with uncluttered background and horizon is the other pre-requisite. Backgrounds with marinas, tall shoreline buildings and other sailing boats visually confuse a photograph viewer and distract their eye away from your boat, which should after all, be the main subject of the image. If shooting from jetty or quayside, you can crop out clutter by using a tripod and a longer telephoto lens to zoom closer to the boat. The tripod’s stability will also give better longer exposures in lower light conditions. If shooting from the anchored boat, remember to switch on image stabilisation and use your body as a shock absorber to reduce the ‘bobbing’ motion transferring your camera.


  1. 4.Thinking about camera equipment

For everyday sailing I carry my mobile phone, an underused GoPro Hero 5 and a Sony HX 90 digital compact with a x30 optical zoom. Both phone and camera are good for general photography although using the latter on zoom leads to some significant handheld camera shake and fuzzy images. This season I will be using my new mid-entry range DSLR camera if conditions are relatively calm and making greater use of the GoPro for ‘cockpit at sea’ shots.

DSLR and mirrorless cameras produce very high-quality images. Bigger and easier to hold, with accessible controls and larger rear touch screens, these cameras accept different focal length lenses and give the photographer full control over exposure settings, film speed, aperture and shutter speed. The bigger sensor size of DSLR’s capture and hold more detail and autofocus is quicker than on most digital compact cameras. Using a DSLR may require other equipment – see Table One below. It is not a definitive list.  

Table One: other equipment to take with your DSLR
·        Lens hood prevents light flaring on lens and protects camera against accidental knocks.
·        Circular polarizing filter eliminates unwanted glare off the water, saturates colours and increases the contrast between the different elements in a shot.
·        UV filter protects lenses from spray and salt stains.
·        Two kit lenses – I carry a beginner’s kit of an 18 – 55mm and a 55 – 250mm focal length; better lenses are available
·        Spare lens caps – I always end up losing one on a trip.
·        Spare memory card - 64mb capacity with a class 10 card rating, so that I can use continuous shooting or burst mode to capture those spray over bow moments in fine sharp detail.
·        Either a Camera rucksack or a camera strap bag – On a small boat a rucksack may be too bulky, so a shoulder bag is better. I keep the latter securely on me by slinging the strap over my left shoulder and across my chest front so that the bag lies on my right hip as I am right handed. Everything is then secure and easily accessible. Contents are in small waterproof dry bags which are labelled on the outside.
·        One spare battery at least.
·        Lens wipes – I use them rather than the bottom of my fleece (We have all done it!)


Cameras don’t mix well with salt and water so protect your gear. Some compact digital cameras are waterproof and perusing the internet will give many examples and reviews of their merits. My friend’s 12 MP Lumix waterproof compact camera gives amazing quality shots. If, however, you have a non-waterproof one like mine, then invest in a good quality waterproof pouch for it. DSLR cameras can come completely weather sealed but with a hefty price beyond my budget. I bought a simple waterproof cover for my non weatherproof one. It doesn’t protect it from submersion but does from spray and rain.  A DIY option is to use a sturdy plastic food bag with a hole cut in the bottom just big enough to go over lens. Secure it with a rubber band behind the lens hood and access viewfinder and controls via the open end of the bag. Sounds Heath Robinson like but it does actually work. I also carry a dry bag big enough to take my camera bag or rucksack and camera should the weather turn really bad. 

In next week's post I share a few tips about camera settings and safety. if you have any tips on how amateur photographers can get better pictures of boats under sail, please share them below in the comment box. if you have any ideas on how I can get better photographs of me sailing Arwen, I'd love to hear those. Getting on a DCA rally is one obvious one for sure. DCA member's photographs in the Dinghy Cruising Association journal are amazing shots. 

If you are interested in creating sailing videos then see my blog posts below on creating YouTube sailing videos

https://arwensmeanderings.blogspot.com/2017/12/creating-sailing-videos.html

https://arwensmeanderings.blogspot.com/2017/12/creating-sailing-videos-editing-your.html

https://arwensmeanderings.blogspot.com/2018/02/new-article-on-creating-video-films-in.html

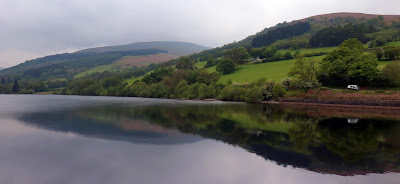
Some photos from a quick visit to the Brecon Beacons

It has been many years since I have been in the Brecon Beacons but this week was a nice return visit full of past memories of mountaineering training courses, walking Pen y Fan, winter whiteouts and supervising Gold Duke of Edinburgh groups many years ago.


Lake and reservoir views

Add caption


Llangorse lake


Cycling canal sides

Brecon and monmouthshire canal


Intimate concerts in converted welsh chapels 

Acapela Studio Pentrych


'Lucky stars'

Cycling the hillsides

past ancient roman fort sites


Brecon Beacons National Park Mountain Centre

along ancient former Roman roads


Passing welsh mountain narrow gauge railways 


Brecon Mountain Railway


Visiting old houses with history

Tredegar House Newport
A former King of England

oak floors laid in the early 1600's with 40' single piece boards

a family member who was both a Royal Navy Captain and possibly a notorious pirate


a family of philanthropists and party givers


where death watch beetle ate the pantry table legs


and the last of the great 'Morgan' family partied the family fortune away

A spring time landscape 


Friday 10 May 2019

In the garden

Breakfast most days is accompanied as our deer friends join us in our garden .................


meanwhile, grass snakes, slow worms and common frogs roam the lower slope grasslands whilst squirrels and birds raid the various bird tables. 

We are lucky people to have so many visits from our wildlife neighbours

Great Western Railway family heritage

A visit up north to see family led to visits to a railway museum and a local volunteer steam railway with Dad and youngest nephew.

Dad and Grandad were GWR men through and through - so some local family history here. It was good for Dad to discover some engines in the museum that he had worked on way back in the fifties.
There is something about 'steam' isn't there.

Ah! Brunel, an amazing engineer

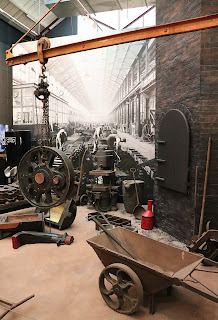
15,000 worked at this railway workshop in its heyday

The patterns and casting department where many apprentices started


skilled carpentry at the carriage works 

During WW2, women took on many of the skilled jobs


Caerphilly Castle 


down into the pits

Assessing her big ends


GWR engineers prided themselves on being the best and during the Twenties, thirties, forties and fifties, it was inevitably GWR engines that won most of the time trial competitions between the various railway companies

Even now, my Dad can still listen to any steam engine that passes him and diagnose within seconds exactly what is wrong with it....an extraordinary skill


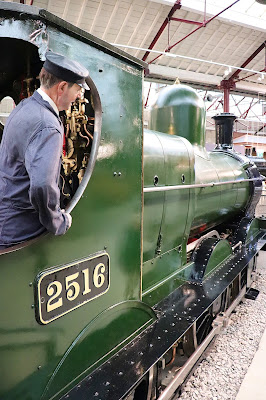
Dad had been on the footplate of this loco many times, one of his 'babies' he frequently worked on 

levers, copper pipe, swooshes of steam, roaring fire - what's not to like riding the footplate 

Paddington to Penzance - the Cornish Riveria Express

King George V

One of Dad's 'babies

GWR sheep were always so well behaved


Polished brass and copper


aah...the ancient original railway art posters 

The picnic basket often carried on longer train journeys 

The 'cocktail/buffet car' above and as it is preserved below today