Arwen's meanderings

Hi everyone and welcome to my dinghy cruising blog about my John Welsford designed 'navigator' named Arwen. Built over three years, Arwen was launched in August 2007. She is a standing lug yawl 14' 6" in length. This blog records our dinghy cruising voyages together around the coastal waters of SW England between 2009 and 2025.
Arwen has an associated YouTube channel so visit www.YouTube.com/c/plymouthwelshboy to find our most recent cruises and click subscribe.
Although 'Arwen' has now been sold to another family and is sailing in new water, this blog will remain a source of inspiration and information for those interested in dinghy cruising and sailing the local waters around Plymouth Sound. So, continue to drop us a comment or ask a question and happy sailing and fair winds to you. Steve and Arwen
Steve and Arwen

Showing posts sorted by relevance for query vlogging. Sort by date Show all posts

Thursday, 30 November 2017

Dinghy cruising: Creating sailing vlogs and videos


Vlogging, is the art of taking an audience on a story journey through video and thanks to YouTube there has been an explosion of sailing videos and vlogs over the last few years. Some, such as SV Delos and Vagabond, are huge sensations, earning their crews’ serious money and sponsorship via their Patreon funding websites. We all need occasional inspiration from watching others sailing exotic climes, whilst doing adventurous activities and meeting interesting local characters but not all vlog content needs to be exclusive, expensive, highly produced or celebrity driven. 

The YouTube videos of Creeksailor, Dylan Winter, Eyeinhand and Roger Barnes, for example, with their mix of home spun wisdom, reflection on life, small boat cruising tips and simply stunning sailing footage are equally pleasurable and as successful in their own way.  Slow flowing waters in muddy creeks with their slumbering seals and wading birds; reed lined river channels with traditional boat traffic; open coastal scenery with swirling tidal currents and diving birds; in all honesty, this is more naturally where my interests lie.  I am a dinghy cruiser, who has for several years been recording short video diaries and more recently vlogs of my cruises on board my self-built 14’ John Welsford designed standing lug yawl ‘Arwen’.
Arwen about to settle on a beach up the river Lynher

If you are thinking about filming your boating adventures, I would urge you to do so. Whilst steering, sail handling and trying to film content simultaneously isn’t always easy and on occasions can even get in the way of being present in the moment (the ‘here and now’ of the adventure), the benefits of videoing a voyage can be immense.  There is nothing better than a short visual diary of your recent adventures afloat to help while away those cold winter evenings until the new sailing season starts.

However, I would caution you at this point. If you are going to film your exploits, make it a rule now, that you strive to produce high quality video, not just the ‘point and shoot a few minutes’ variety of film. So much material on YouTube is of a poor quality that fails to give a good viewing experience.  The success of the afore mentioned small boat cruising videos shows that there is an appetite for simple, well-crafted boating adventures. A few basic skills, done well, can elevate the quality of a short video.   

In the next three blog posts, aimed at those new or just starting to video and vlog, I share some tips on topics ranging from choice of camera equipment, story planning and taking creative shots through to editing footage and setting up and growing a YouTube channel. Self-taught, I am not a videographer expert, but I start with a simple premise, use what equipment you have got to hand and aim for higher quality, better crafted videos that are simple and enjoyable and which allow your passion, skills and experiences to shine through. Remember YouTube can be a powerful force for education, insight, inspiration and change even at a modest level. Someone, somewhere, will appreciate your efforts because it will have inspired or encouraged them in their dreams and ventures. 

So, let’s get going by starting with an obvious question: why do you want to video your sailing/boating adventures?

Readers of a ‘certain age’ will remember the exciting undersea world of Jacque Cousteau and his adventurous voyages, sharing with us the tantalising glimpses of a hitherto unknown world beneath the waves. On board Calypso with his camera in hand, he left an indelible impression on this easily enthralled eight-year-old. I so wanted to be one of the cameramen filming the reefs.  I pleaded for some relative to knit me Cousteau’s familiar trademark red knitted hat, but alas, one never materialised and it wasn’t until I was in my forties that I got to swim over a coral reef with camera in hand. 
Fast forward 50 years or so and I still want to be an amateur cameraman filming my sailing adventures.  I’m no budding Spielberg or Dylan Winter, nor will I capture the glitz and glamour of the talented SV Delos team but after several years of creating 170 or so short sailing videos (of variable quality I confess), I have picked up a few ideas and tips on how to film in small boats. 
So here is Tip 1: start with a clear rationale for why you want to make videos
Aside of wanting to be the next Jacques Cousteau (oh how I wish…!) my real motivation for starting my ‘Arwen’s Meanderings’ blog and YouTube channel back in 2009 was threefold. Firstly, I wanted to create diary videos and blog content on my boat building and sailing adventure so siblings who were, at that time, scattered across the world could share in my ventures, travels and news. Second, was my desire for an online ‘visual memory bank’ for my future 80-year-old self; a reminder that I had followed my dreams by building a boat, learning to sail it and having micro adventures in it. Finally, if I could produce content that inspired others to do likewise and seek their own adventures on their own home waters, then that was a bonus.  YouTube, being free to use, was the obvious and easiest place to store and share such content. 
Right from the start, have your own clear rationale for why you want to video your sailing adventures because it will help shape what kind of videoing and story line planning you do. I’ve provided some guiding questions to prompt your thinking in figure 1. 
Figure 1: working out your rationale for videoing your adventures
·        What is it you want to achieve? 
·        Which aspects of sailing or boating are you most passionate about? 
·        What could you vlog/video about confidently? 
·        Where do you want this vlogging/videoing adventure to lead you?  
·        Who will be watching your videos and how big is the potential audience? 
·        What type of video/vlog content do you want to create?
o   Video diaries for yourself, family and friends? 
o   A ‘How-to’ series regarding sailing, boat maintenance and navigation? 
o   Videos to inspire others? 
o   Vlogs and videos as a money earning venture?
o   Videos about boating locations? 
Across my channel, you will find a cross-section of videos which I am slowly organising into play lists. Some focus on ‘How to’ e.g. build a galley box or use an anchor buddy. Some are about Arwen and her equipment e.g. what’s in your toolkit? What equipment do you carry on your sail boat? Many are simply about a day sailing adventure or a video diary of a three-day cruise to a local destination. Across most videos, I try to stay true to my original rationale – a dairy for my 80-year-old self to share with my siblings, parents and friends; which might inspire others to do similar things, but in a better way than me! 
Once you have given thought to your rationale for video creation, the next question is surely: What video equipment do you have/need?
I dinghy camp/cruise the waters of Plymouth Sound and her tributary rivers, occasionally venturing along the coast for camp cruising trips to Falmouth, Fowey, Salcombe and Dartmouth. I use equipment that I have built up over many years of mountaineering and travelling.
So, tip 2, don’t rush out and buy camera gear. Start by taking a look at what you have. Will it do what you want with some adaptation, imagination and flair? 
For small boat adventures I try to assemble equipment that fulfils some of the criteria in figure 2.
Figure 2: things I look for in my camera gear
 
Rugged and shockproof
Simple to use
Lightweight
Compact size
Waterproof and dustproof
Good rear screen size
Image stabilization
Wind noise reduction technology

Facilities for external mic attachment
Good auto focus
Strong build materials
Adaptability and multipurpose use

In-built wifi
1080p recording quality
Range of manual settings


This is all my camera gear used on Arwen, just not necessarily all at the same time 

I am sure other small boaters could add more to the list. YouTube and the wider internet are great sources of information about recommendations, reviews and personal preferences as to what camera gear sailors and travellers like to carry. 
I have personal preferences too.  On Arwen, I routinely carry a compact camera for photography and vlogging; and 4 small action cameras for videoing. On longer trips, a drone for aerial footage and a small range of accessories such as solar battery chargers are also taken along. 
My normal vlogging camera when land based is an old Panasonic Lumix DMC TZ40 compact point and shoot that has an array of intelligent functions, a x20 zoom and records 1080p AVI files.  In a waterproof pouch when on Arwen, it has stood the test of time. Yes, it lacks an external mic attachment (so wind noise can be excessive when out and about) or a flip up screen (so essential for framing that perfect selfie vlogging shot). No, it isn’t particularly shockproof either but it is simple to use, compact and lightweight. Current popular vlogging cameras in 2017 seem to be the Sony RX 100 and the Canon G7x. Remember, you can just use your humble mobile phone as well. Many today take good 1080p footage, allow the use of a lapel microphone with it and come with editing apps that can produce worthwhile, high quality short videos. Whatever camera you use as your main vlogging piece, tip 3 is use a tripod with it to improve stability and reduce video shake. I carry two, occasionally three tripods of different sizes, from mini and medium sized Joby gorillas to a lightweight 5’ collapsible aluminium one with extending top. 

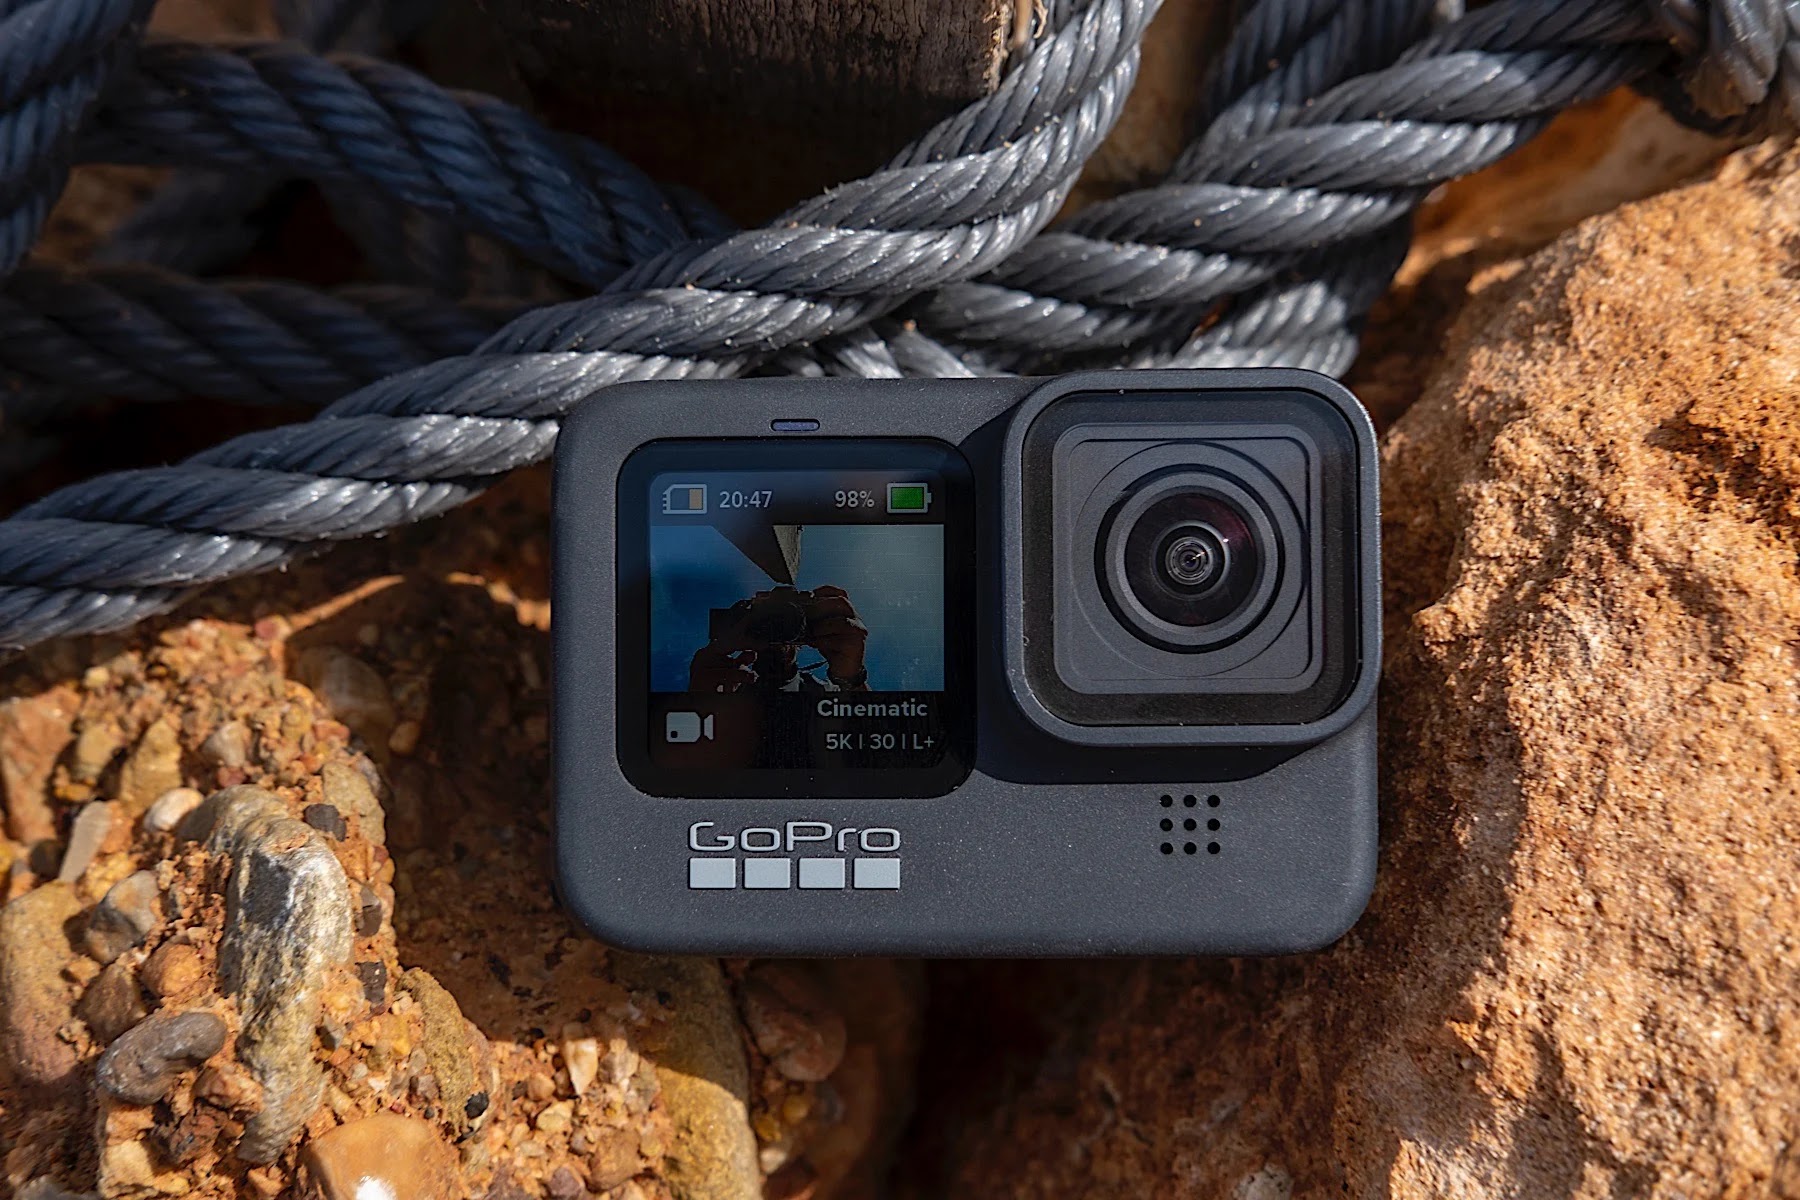
I am a huge fan of action cams. Designed to be attached to helmet, car, surfboard, bike, boat, well practically anything frankly, most are small, tough, simple to operate and can catch some epic video footage. Their POV (point of view) footage is often valued by TV companies in situations where normal video cameras can’t be used.  I have always gone for the market leader GoPro, out of personal preference, who describe themselves as an “experience-sharing company”. My Hero 5 Black lives up to this expectation. Small, light, tough with both 1080p and 4K video, voice control, image stabilization, photo-burst and time-lapse photography, it’s waterproof to 30m and is my on the water ‘go to’ vlog and video camera. Video quality is excellent given its diminutive size and it is inconspicuous when vlogging in public. With an array of mounts, it is exceptionally versatile. Teamed with a chest harness, head strap, selfie stick or flexi clamp and you can practically video most action on board a boat. In-built WIFI controlled from a phone app allows you to mount and control it in difficult to access places such as bowsprit or on the top of an upper gaff yard. It comes with Quik app which simplifies downloading and editing. My niggles? The touchscreen interface is fiddly with cold hands and is often slow. Audio quality is not good in windy conditions and fitting an external mic immediately stops it being waterproof. 

However, today there are now some serious lower cost alternatives to Gopro on the action cam scene and they do just as good a job. If I was starting out now and budget was an issue, then I would take a serious look at some of these. After all, depending on what you want to do with it, do you really need all the bells and whistles like GPS, voice control, WIFI or even a rear screen? My first action cam was a Hero 2 which had none of these features and it is still in use now, giving me great footage at 1080p. if you are thinking of getting your first action cam I have added some useful tech review websites on action cams in figure 3. 
Figure 3: Technical review websites on action cams for 2017 

Tip 4, when using an action cam, for that fully immersive experience, get up close to the subject you are shooting; and if using it for vlogging, be around 30 - 40cms away from it. If standing and you want a selfie of yourself, aim the camera at your thighs area to get all of you and some background in the shot. Keep it steady; being small they move around and vibrate wildly. Time lapse set to 1 second after pressing the shutter allows you to move the camera around and change your facial expressions. Remember too, it is not a distance shot camera. Distant shots on a GoPro or action cam will have a slightly curved horizon. It uses a fish eye lens!
I also carry an old GoPro Hero 2 and two SJCam 4000’s. Cheaper options than a GoPro, they still film in 1080p, are waterproof and can use Gopro mounts. Here is tip 5. Having two or three action cams gives you a major advantage in filming on board your boat. Play the angles by combining shots from different positions to get a more interesting overview of the action on board. After editing, the subject event videoed from those ‘blended’ alternative angles and perspectives leads to more visually interesting story telling. Your viewers will thank you for it! At the cheaper end of the action cam spectrum, I use the SJCam’s in high risk situations on small floating platforms to get out of the boat shots of Arwen sailing by!
And talking of visually interesting videoing, my best move was getting a small selfie drone. Compact, with an array of extraordinary technical features, and controlled via remote controller and/or mobile phone, the DJI Spark has given me the ability to take some stunning aerial shots of Arwen moored or anchored in upper river creeks. If you already shoot videos and have action cams, then perhaps investing in a small drone is a good thing. It elevates your video footage, excuse the pun! Whilst I have yet to master landing the drone on the boat whilst sailing in open waters (something that will take some bottle on my part), shots of Arwen in a hidden anchorage have added visual interest to my videos and been appreciated by some of my viewers. 

If you want to find out more about the camera gear, mounts and drones I carry on Arwen, check out this video at https://www.youtube.com/watch?v=e7bumIffvfE&t=327s
Some last tips (6) regarding equipment. Firstly, really get to grips with how your cameras work and what functions they can perform before using them onboard. Fiddling about and sailing at the same time is somewhat difficult and bound to lead to disaster! Secondly, carry lots of spare batteries and get into the habit of charging them at night and/or immediately after you come back from a trip. In that way they are ready to go next time. Finally, invest in some reputable 64 or 128 Gb class 10 90mbs memory cards (e.g. Sans Disk Extreme, Samsung EVO) and clear them at the end of every trip after editing so they are ready for the next adventure. 
In the next blog post I explore how to mount your camera on a boat to get creative shots of your sailing/boating activity; discuss how to create a story line with appropriate footage and focus on recording high quality audio for your films. 
The final blog in the series will look at some post production editing tips and thoughts on how to set up and grow your YouTube channel.  In the meantime, here are a favoured few of the many sailing channels I subscribe to. You will have your favourites too.
Two really big player vlogs: 
Favourite small boat vlogs:
Enrico Franconi: https://www.youtube.com/channel/UCegYlHIxJiPXRDdJzul7LJw
For reflection on the importance of our oceans and waters:
My own channels: 

Sunday, 20 February 2022

A pleasant surprise with the Dinghy Cruising Association

 I have just returned from an emergency dash across the country to see my son who was rushed into hospital a few days ago with severe food poisoning - serious enough to scare the paramedics anyway. He is now discharged but it is a very slow recovery and it will take time for him to return to normality. 

So, it was a very pleasant surprise to find an email from the technical adviser of the Dinghy Cruising Association, informing me that my article about making ditty bags had won the association's  'Peter Bick Memorial Trophy' award for the best technical article in the association journal this year. 

Apparently I described the process in great detail with clear photographs and diagrams and in an entertaining style. 

If you are not a member of the association and don't have access to the journal, you can access my 'unrefined' original posts about making the ditty bags here https://arwensmeanderings.blogspot.com/search?q=ditty+bags

I have to say I am surprised. The Journal is an amazing magazine with such extraordinarily well written articles on a whole host of topics to do with dinghy cruising. It is, frankly, one of the best small boat magazines out there and that is due to the amazing editor Keith Muscott, his editorial team and the  association contributors. There were, in all honestly,  many excellent technical articles this year, all far more lucid, analytical, thoughtful and inspirational than mine, but I'll take it. Let's face it when it comes to dinghy sailing and cruising everyone knows I am a 'work in progress'

David also said he was impressed by my articles about vlogging as well but since they were inevitably more focused on the film-making process, he felt the ditty bag article was definitely more nautical. You can access my unrefined posts on vlogging here: 

https://arwensmeanderings.blogspot.com/search?q=vlogging


 I’ve enjoyed writing for the journal over the last couple of years and Keith as editor, has always been very patient and forgiving of my rambling efforts, whether it be technical or cruising articles. Let's face it, I’m not really a sailor, rather an ex mountaineer, whose knees are shot and who turned to ‘sailing’ later in life, doing some starter lessons with Zoe and Ross down at Salcombe in a Wayfayer at the Island Cruising Club.  I think we can all agree that whilst I haven’t killed anyone yet and to my knowledge thus far, not been responsible for any dangers on the water, my sailing knowledge, skills and sail trimming and setting leave much to be desired. John Welsford, is very, very patient and kind. As a life long learner and educationalist, I believe that making mistakes and sharing them honestly, is an important life skill, as does he I think, although I suspect he just wishes I could make fewer of them in one of his boats 😊

 I’m never sure that anything I write is actually this worthy but I try and hopefully at some stage I will improve. Contributors to the Dinghy  Cruising Association journal are amazingly talented and their writing is fluid, informative, entertaining and awe inspiring. Maybe I will get there one day.   

 I have always maintained that for me, dinghy sailing is enjoyable but also an ‘ends to a means’ – exploration of the nooks and crannies and communities of my stunning local waters. Just as important as the sailing, are the hobbies that dinghy cruising allows me to pursue – my love of marine biology, expeditioning, camera work and also my fledgling interest in astronomy and astrophotography. (I am just trying to work out how to safely carry such gear on a dinghy to exotic far flung dark sky corners up the Tamar and Lynher ).  Hence previous articles about vlogging! If anything I do inspires others to dinghy cruise (only doing it better than me), then brilliant.

In this light, I am at the moment working on a blog post about taking nautical and coastal themed photographs from a beginner's perspective. It will be followed up by another one about astrophotography from little creek beaches!  If you search astronomy in the blog search bar, you will find some beginner tips about this as well. 

 Anyway, my sincere thanks to the judges this year at the Dinghy Cruising Association. As a tea-totaller (necessity not choice), I will refrain from drinking tea out of the tankard and raise it to all the DCA membership with a tipple of Perrier....... DCA members have been inspirational and I have learned so much from them all. I just wish I could do them justice by pulling it together in a better way than my normal shambolic approach to sailing (and anything technical 😊)  

If you haven't joined the DCA and might be interested in doing so, here is the link:

https://www.dinghycruising.org.uk/

There is also an active Dinghy Cruising Association Facebook forum - well worth joining. 

Friday, 1 July 2022

The Dinghy Cruising Association new photography, videography and art work competition

 You may be aware that the British Dinghy Cruising Association has created a competition to go alongside ones for the best technical article and best cruising log in its journal. This new competition centres on photography, videography and artwork with monetary prizes in the form of Amazon vouchers. 

DCA website: https://www.dinghycruising.org.uk/news/dca-launches-a-photo-competition 

An article I wrote for the DCA journal about the competition is published instead as a PDF download on their website and can be found in my previous blog post. At the end of that post, I promised that I would also post answers to two further questions, which being very specific about photography, probably weren’t appropriate for inclusion into the journal or on the DCA website

These two questions were:

               What equipment can I use to get a ‘pleasing’ dinghy cruising related photograph?

               What basic photographic skills would I need to develop in order to obtain this photo?

If you have read the article/first blog post and are now feeling inspired but left wondering whether or not you have the right camera gear (you do by the way), then perhaps this section below will help you further.  


What equipment can I use to get a ‘good’ and suitable dinghy cruising related photograph?

Simple answer – any practically any camera you have as a good photo comes from the skill and knowledge of photography employed, not necessarily the actual camera used. In saying this however, there are some things to consider and I discuss these in the context of my own camera equipment.  Let’s start by looking at what camera equipment I carry on Arwen (figure 1).

Figure 1: what photographic equipment do I carry on Arwen?

As standard:

·        GoPro Hero 9 on long selfie pole (plus spare batteries and various mounts etc)

·        Two GoPro Hero 5’s and assorted mounts/fittings (plus spare batteries etc)

·        Sony HX-90 compact digital optical zoom camera (plus spare batteries) in waterproof pouch and dry bag

·        Spare micro-SD memory cards which can fit any of the cameras) – minimum 64Gb class 10

·        Camera cleaning kit – cloth, lens spray, puffer brush)

·        Clamp mounts for GoPro

·        Mini Gorillapod tripod for compact zoom

·        One portable power bank

·        Either a Camera rucksack or a camera strap bag – On a small boat, you may find a rucksack too bulky, so a shoulder bag is better. On shore, I keep the latter securely on me by slinging the strap over my left shoulder and across my chest front so that the bag lies on my right hip as I am right-handed. Everything is then secure and easily accessible. Contents are in small waterproof drybags which are labelled on the outside. In the boat, I have it all in a small photographic rucksack, inside a large drybag.

·        Lens wipes – I use them rather than the bottom of my fleece (We have all done it!)

Occasionally:

·        DSLR Canon 800D plus 18 – 55mm F/4.0 and 55 – 250mm F/4.5 zoom lenses (spare batteries)

·        Lightweight full-sized tripod

·        Spare lens caps

·        UV filters on lenses - protects them from scratches, salt and spray

·        Circular polarising filters for both lenses – great for sunny days - eliminates unwanted glare off the water, saturates colours and increases the contrast between the different elements in a shot

·         Lens hood prevents light flaring on lens and protects camera against accidental knocks.

Very occasionally – for astrophotography

·        Above camera plus Samyang 135 mm F/2 lens

·        Skywatcher Star Adventurer 2i pro star tracker

·        Benro carbon fibre full tripod – you can get very cheap second hand tripods off Facebook marketplace etc  - a tripod allows you to use telephoto lenses in low light on a DSLR  - stability without camera shake when you need wider apertures and longer shutter speeds but no flash.

·        Samsung Galaxy Tab A tablet

·        If you are taking photos at golden hour from land – get a remote shutter release cable as well to avoid any camera shake when taking a photo.


My compact zoom camera (a Sony HX90 – also a great vlogging camera by the way) and GoPro Hero 9 (for those exciting spray over the coaming/raining moments, when a small waterproof camera is needed or for getting those good close-up shots of crew in action) are the two main cameras I carry regularly onboard. My smartphone, a middle of the road one with ok-ish images (but not ones that could be enlarged for printing off) lives in an aqua-pouch when onboard so effectively eliminating its function as a camera.  Occasionally in relatively sheltered inland waters like the River Tamar, I take my bigger DSLR although I rarely use it when actually sailing. One handed DSLR camera photography is something I’m unlikely to master any time soon.


A recent ‘digital camera beginners’ course’ enabled me to ‘get off auto’ and ‘engage with ‘manual’’ on both my compact and DSLR cameras. My Canon 800d DSLR with various kit lenses gives me the most choice, control and quality over images. DSLRs (and mirrorless cameras) give very high-quality images, are bigger and easier to hold, have larger rear touch screens and relatively quick autofocus.  Great onshore, or if you are in a boat not helming or crewing; impossible to use well if you are ‘active’ in the dinghy. If it isn’t a weatherproof one, they aren’t great with saltwater spray!  Mainly used when I have finished sailing and am moored or dried out, the DSLR accompanies me on shore explorations and is my astrophotography kit for night time. I can choose aperture, shutter speed, ISO and control depth of field and focus. Tack sharp background or bokeh blurred? This kit gives me those options.


An alternative to the DSLR is a ‘bridge’ camera. It is mid-way between a point and shoot compact and a DSLR. It has a tripod thread, a flash shoe and control over exposure, aperture, shutter speed and ISO (light sensitivity). Visit the ‘Lone kayaker’ website at   https://thelonekayaker.wordpress.com/     to see one used well. All of Rupert’s images taken from his kayak are on a bridge camera which he stores inside a dry bag!

Figure 2 gives some reviews of bridge and DSLR cameras on the market today. If you chose a bridge camera or DSLR – find one which has a dial or buttons to manually control exposure, ISO, aperture etc. Trying to access a menu on a screen with wet fingers is a disaster waiting to happen!  Avoid digital zoom as any image done this way will lose sharpness and stores little information for later post processing. You want optical zoom!

Figure 2: reviews of DSLRs and bridge cameras (I take no responsibility for the quality of the reviews)

Best entry level DSLRs 2022

https://www.techradar.com/uk/news/best-entry-level-dslr-camera

https://photographylife.com/best-entry-level-dslrs

and slightly more generally https://www.t3.com/features/best-entry-level-camera

bridge cameras

https://www.digitalcameraworld.com/uk/buying-guides/the-best-bridge-cameras

https://uk.pcmag.com/digital-cameras/85599/the-best-bridge-cameras

The Sony HX-90 digital/optical zoom compact gives me great picture quality, a x 30 optical zoom lens, a flip up backscreen and inbuilt flash. Small and lightweight, it almost does what my DSLR can do. Most sailing days I’m happy to get this out of its waterproof storage bag to take photographs at its widest lens opening and I can use it one handed. I can shoot in RAW mode (better for post editing, enlarged prints and magazines) and I avoid ‘digital’ zoom which degrades the image quality. Bobbing about on waves and trying to do telephoto zoom shoots with it are just never going to happen, so I use it on its widest focal length and best quality settings; enabling me to then crop the image in post editing without losing image quality. Of course, it’s now dated, overtaken by action cameras and waterproof smartphones and newer compact cameras, but it still does the job and I’m sentimentally attached to it as it was a gift given to me when I retired.

Those who know me well know I am an action cam – GoPro aficionado! There are many good action cameras available now and my previous articles on vlogging in the DCA journal and also posts on this blog give a good overview of these. Personally, I only use GoPro or DJI Action for photographs and I favour action cams with a front screen that shows me what I’m photographing when using for selfies (it’s also a vlogging advantage).  My various GoPro’s have been bomb-proof over the decade I have been using them. There are plenty of YouTube videos about settings for your GoPro camera and figure 3 shows what photo settings I have for my Hero 9. Remember on any camera or advanced smartphone, RAW format gives you best quality images and plenty of options for creative post editing.  Magazine editors prefer RAW as well! 


Figure 3: my GoPro photo settings for Hero 9  Note -  it has a fixed aperture of F/2.8

Photo – linear, Superphoto, timer 3s, zoom 1.0x, WB – auto, sharpness – low, colour – GoPro

Night photo – wide, shutter – 30s, RAW, TIMER – 3S, ZOOM 1.0X, wb – 5000K, ISO min – 800, ISO max – 1600, sharpness – low, colour – flat

Burst mode – wide, burst rate – auto, output – standard, timer – off, zoom – 1.0x, WB – auto, ISO min – 100, ISO max – 3200, sharpness – high, colour – GoPro

Use self timer – if you want to be in a shot. Touch zoom slider can bring a closer view of the action. 

My GoPro excels at those really big landscape shots (choose linear mode) and those onboard boat close ups. Avoid super wide settings (distorted fish eye results with curved horizons) and don’t use them for distant shots – they were never designed for telephoto images. You just won’t be able to crop in effectively during post production editing!

Now, I am going to be slightly vague here because I have to confess, I have never owned a decent smartphone. SWMBO draws the line at expensive smartphones. Mine is a lower middle end smartphone, non-waterproof, but which does reasonable images. Great for social media but not much else. It gets used mainly for navigation and texts and that’s it. Great for wide angle images, upmarket smartphones now do great telephoto shots as well but the risks of dropping it overboard? Getting it wet? I’m not that brave given the higher costs of the better equipped phones.  If you are braver than me, then your high-end smartphone should do portrait and landscape mode, render good flash and allow a fair degree of manual control over exposure and some settings like aperture. Some will blur the background whilst keeping the subject of the image pin sharp. Several even allow you to ‘magic away’ distractions in your photos. And of course, they are great for spontaneous use; after all, we carry our smartphones with us everywhere.

Figure 4 gives some websites that review waterproof compact digital cameras and smart phones

Figure 4: reviews of waterproof digital compact cameras, digital zoom cameras and waterproof smartphones  (I take no responsibility for the quality of the reviews)

Best waterproof digital cameras:

https://www.digitalcameraworld.com/uk/buying-guides/best-waterproof-cameras

https://www.techradar.com/uk/news/best-waterproof-camera

https://www.amateurphotographer.co.uk/buying-advice/top-12-best-waterproof-and-underwater-cameras-164057


Best budget compact digital zoom cameras:

https://www.digitalcameraworld.com/uk/buying-guides/best-compact-camera

https://www.digitalcameraworld.com/uk/buying-guides/best-point-and-shoot-cameras

https://www.techradar.com/uk/news/best-compact-camera


Waterproof smart phones;

https://www.digitalcameraworld.com/uk/buying-guides/best-waterproof-phone

https://www.techadvisor.com/test-centre/mobile-phone/best-waterproof-phone-3789597/

https://www.tomsguide.com/uk/best-picks/best-waterproof-and-water-resistant-phones


If you have an existing compact, bridge or DSLR camera here are some quick tips to help maximise the image quality in your photo. Firstly, more pixels do not necessarily mean better quality pictures. It is sensor size which is important. The more information your sensor holds, the bigger you can enlarge a photo when printing it off. Secondly, if you are buying a new camera, get a reputable make – Canon, Nikon, Sony etc. Thirdly, APS-C on DSLRs means it is a crop sensor but it will do absolutely fine. Full sensor size DSLRs are very expensive!

Fourthly, no surprise here but salt water smears lenses lens and rusts metal fittings! Some DSLRs are not weatherproof. Those that are tend to be very expensive. Protect your DSLR by getting a giant zip lock freezer bag, cutting a hole for the lens to poke through, sealing the camera in the bag and securing the bag opening over the lens with a thin stretchy elastic band. Well, that’s how I do it.  For your compact, if it isn’t a waterproof one, you can buy water proof pouch bag specifically designed for optical zoom lens compacts. Make sure you get one that can accommodate your compact on its full optical zoom lens stretch – go on – ask me how I know that’s important!!  Invest in a good brand if you buy an aqua pouch for your compact or smartphone. Cheaper versions leak – go on, ask me how I know – again!!! Put two little bags of desiccant into any bag that holds a camera or smartphone – they absorb any moisture trapped in the bag. 


Ok, so at this point we have briefly discussed basic photographic equipment considerations. Now a public service health warninggo no further unless you want to learn how to get off ‘Auto’ mode and into ‘Manual’ mode on your camera, smartphone or action cam. The last bit of this blog post finishes by examining some very simple, basic, beginner principles about shooting photographs. This is just for those who like me dream of getting off ‘auto’ camera mode just once in their lives!

Our final question:  

What basic photographic skills would I need to develop in order to obtain that ‘good’ photo?

If you haven’t done so yet, I would strongly urge that you read the article in the DCA journal or the first blog post about the competition and what makes a ‘good’ boat photograph. By doing this, the following will then make better sense! The article looks at what makes a good photo and discusses aspects to do with composition.


Some pre trip thinking about camera settings is very important. If you want the best possible quality photographs for inclusion in a magazine or to enlarge as prints of 8” x 10” or above, shoot and save images in RAW format but expect some post editing in a photo editing software program afterwards to get the best out of the image. RAW format images give you the most information and detail.

If you want photos for a personal album, a blog or an ‘Instagram’ post, JPEG’s are perfectly fine and take up less room on your memory card; just dial in the highest quality JPEG setting your camera can do. My DSLR, GoPro and compact camera can shoot both simultaneously. My smartphone shoots JPEGs only.  Newer smartphones can shoot in both JPEG and RAW. Quick warning reiteration – RAW images never look as good on your rear-view screen as JPEGs do – but after post processing – oh my do they pop then. Always, always select the best/highest quality megapixel resolution/ image size setting your camera can do. It will need a bigger memory card but will be worth it. Magazine editors by the way, will love you for that choice!

And talking of these worthy individuals, resist any temptation to digitally auto enhance any images you take for magazines. Let the editors and their team do it as they know what they are looking for and what will best fit their page layouts.

Your camera on auto setting will give you good pictures straight away as it selects the optimal exposure, shutter, aperture and ISO speeds. Don’t be afraid to use auto mode at sea. In lower light or where you are suffering camera shake, select TV (shutter) mode as it allows you to choose the shutter speed. The camera will then automatically select the most appropriate ISO and aperture settings to get you a correct exposure at that shutter speed. However, I like to exert greater control and thought over exposure and focus in an effort to really boost image quality and detail, and so I have been familiarizing myself with manual, shutter and aperture modes on my cameras. It is not within the scope of this article to give detailed advice about camera settings but getting off ‘auto’ is fun and there are plenty of YouTube tutorials explaining how to adjust shutter and ISO speed, aperture and exposure compensation. Look up ‘The exposure triangle’.

On some compact zoom cameras and most DSLRs, either via a dial or through a menu set up, you can select from M (manual), AV (aperture), TV (shutter) or P (auto) modes. By now, you are beginning to realise that there are three things to consider in getting a well exposed photo: shutter speed, aperture and ISO. So, let’s look at each of these a little more closely, through the context of this ‘Exposure triangle’.

Shutter speed is how long your shutter remains open and is measured in seconds or fractions of seconds e.g. 1/60th, 1/500th. Fast shutter speeds freeze action e.g. water splashes and spray over the deck and let in little light; also good to use if using long telephoto lenses or shooting fast moving boats. Long shutter speeds (shutter is open longer) allow more light onto the sensor.  Turn on the camera’s image-stabilization system and you can shoot at slower shutter speeds (1/15, 1/8, or 1/4 of a second) to keep the boat in focus while blurring the water. The latter technique is easier toward sunrise and sunset, when light levels are lower.

Changing the ISO (sensor sensitivity) will capture more or less light. The higher the number you choose, the more light it captures, but at a cost. The higher the ISO, the ‘grainier’ the picture will become!  To capture images of boats sailing, set your ISO speed to between 100 – 400. For example, on bright sunny days choose a low ISO around 100 because you have plenty of available light. On an overcast day, you might set it to 400. Remember, don’t go higher though as this will lead to a ‘grainy’ picture and that is something you want to avoid. High ISO speeds do however, allow faster shutter speeds. (See shutter speed above).

Your choice of aperture (how wide open your lens diaphragm is to let light through) determines how much of your shot is in focus. A wide aperture, (the smallest ‘f-stop’ number) allows a fast shutter speed and more light through, thus reducing motion blur. It ‘freezes’ any action and gives a shallow depth of field (only the subject is in focus, the rest of the image may be blurry). Increasing the aperture (a higher F number) brings in more motion blur, less light but more depth of field so the background comes into focus more.  In low light, use a wide aperture (a small F stop number) and a slow shutter speed but remember you will need to use a tripod or prop your phone/camera on something to hold it steady to avoid shake blur. I would also set a shutter timer delay (on most phones and cameras) so that when you press the shutter button, the camera delays taking the photo for a few seconds so that any camera shake settles down before the image is taken.

If you want that ‘looking along the length of the boat’ shot to be in focus from foreground to background then you need a big depth of field so select aperture priority mode on the control dial and set aperture to between f16 - F22. The bigger the f/number, the bigger the depth of field. The camera will automatically set shutter speed and ISO appropriate for the day’s conditions. If I wanted just the boat’s foreground in focus but the background blurred (called bokeh), I need a small depth of field, so apertures of f8 or below.  A good general shooting setting for reasonable depth of detail across your image is f8 - f16.

You can read more about the exposure triangle here at:

https://petapixel.com/2017/03/25/exposure-triangle-making-sense-aperture-shutter-speed-iso/


Diagram 1 – the exposure triangle. This diagram shows the simple relationship between shutter speed, aperture and ISO and what impacts altering each has on depth of field, grain and sharpness.

For a good video explanation try this one from PhotoPills  https://www.youtube.com/watch?v=WA8JGwnxjBw

And for smart phone camera users, this may help as well: https://thesmartphonephotographer.com/exposure-triangle/

Remember, it sounds complicated but once you have your head around the basics, it becomes easier to understand. If you want to move onto manual – practise onshore before trying it for the first time from a boat!

Some quick tips about other settings, mainly on DSLR cameras. If you are using a DSLR camera to take a photograph of a boat, from another boat, keep lens auto focus and image stabilization switched on. If you want to keep the moving boat permanently in focus switch your camera autofocus mode from ‘One shot’ (or AF-S) to ‘Servo’ (or AF-C) and this will allow you to half press your shutter button to continually focus on the approaching boat until you are ready to take the shot.

I set white balance to auto when saving RAW images as I can alter them in most post editing software programs and if truth be known, trying to remember to manually set up my camera for the correct white balance every time I take a shot is beyond my limited brain capacity. My friend, saves in JPEG’s, and chooses a white balance option mode from his camera menu, suited to the conditions on the day - bright sunlight or cloudy skies.  Remember out on the water, the sky, water, sails and hull may be over bright so familiarize yourself with how to alter your exposure compensation if using a DSLR. When your camera’s light meter reads ‘0’, then exposure is correct. +1 means the image is over exposed (too bright) by one stop. Conversely, -1 on the meter tells you that your image is under exposed (too dark) by one stop.

If you have worn polarising sunglasses at the seaside, you know that glare disappears, and in clear water, you can see the sandy bottom, the seaweed and scuttling crabs with startling clarity. A polarizing filter on my DSLR lens achieves the same thing, reducing glare, removing unwanted reflections and intensifying the blues and greens in the scene. It also makes white fluffy clouds really pop in bright blue skies. Be aware that the filter will often reduce the light entering the lens and so if shooting in aperture priority mode, your camera will slow shutter speed slightly to compensate for this. To ensure I get that ‘freeze the water’ shot, I have to remember to raise the ISO setting a little higher.


Oh, and one more thing, I turn off any date, time or GPS location stamps that might imprint on the final image. An irritating way to spoil a perfect shot!


When you have got the images, it is time to take them back and process them. If you are doing them for inclusion in a printed magazine, definitely talk to the editor before processing your images. They may just want you to send them the RAW file so that they can make editorial decisions about processing, cropping etc. If you are wanting to print it and frame it, try not to amend the image too much. Don’t over process it!  Less is more! Do just enough to keep yourself happy. Focus on subtle iterative adjustments to exposure, contrast, highlights, shadows, clarity, vibrancy and saturation (depending on the post editing program you use – I use Affinity photo). Use Youtube tutorials to get better at the post processing skills.

If using a DSLR or a GoPro you will do most of this editing once home. With a smartphone, there are many apps which will allow you to do it there and then. Editing and posting on the move – amazing!


What about using a drone camera? You haven’t mentioned that yet Steve! Um, possibly with good reason! On My drone I have some control over exposure, aperture and shutter speed settings or I can just go auto! You’d better be a really good drone pilot before venturing it out over water or taking off and landing on a boat! Know exactly how long your batteries last and leave spare battery time for possible tricky landings. Disable the ‘return to home’, ‘collision avoidance’ and ‘distance limitation’ settings. On a moving boat, you won’t still be where you took off, even if you are anchored! You may need to grab it by hand on landing! So, wear protective gloves! Learn to watch the screen not the drone and have an observer watching the drone position. Take into account wave and wind conditions. Good drone shots include looking vertically down on the boat, centred over the mast. Try not to over expose your image. If you have polarising filers to fit the drone camera, use them. Set exposure settings to the boat not the surrounding sea. Great location shots are when the boat is anchored in a stunning bay in the evening and you can fly the drone lower to catch the boat against the backdrop of a cliff and/or beach.

And finally, (well done by the way on making it this far), lets finish with a few more useful tips.  Ready to take a photo of Arwen and armed with correctly set equipment and shot lists (see previous post), I do try to ensure she is tidy and clean and looking her best (tip 1). So many of the photos my friend took of my boat last year were rejected because I’d forgotten to take in fenders on the starboard side or allowed strands of reefing line and snotter control halyards to dangle across my face. Worst was my display of poor seamanship skills, through a sail with a huge clew to throat crease. So, no baggy sails, no loose lines, no cluttered cockpits and no dragging fenders; just a tidy, clean, boat displaying a good turn of speed, full sails and water flowing serenely along its hull. If only!

My planned ‘shots’ list for the day serves as a memory aide but I won’t stick rigidly to it. I will develop situational awareness (tip 2) from the start by sitting back a while before shooting and taking a look around the sailing area I’m passing through. If I’m crew in another boat shooting other peoples’ boats, I’m looking for those unusual shooting angles as the boats sail around me.  I try to anticipate what boat and helmsperson might do on different reaches and tacks and also look for those unscripted interactions between helmsperson and boat which show their sheer joy in sailing their own boat. Some images of crew intently engaged in ‘action’ such as raising a sail, commencing a tack or furling a jib capture ‘movement’ that conveys the sense of a boat being ‘under way’. My previous post gives further ideas.

And lastly, a plea about safety (tip 3). Even in an anchored boat, it’s one hand for yourself and one hand for the boat. Keep your camera on a short neck strap so, if need be, you can quickly let it go to use two hands for safety. Try to shoot from a seated position so there is less chance of slipping or being a MOB casualty and wear appropriate grippy footwear, deck shoes or yacht boots.  With suitable clothing and sunscreen for the day easy to hand, always wear your life jacket or PFD as well.

I hope across the two blog posts you now have all that you need to help you go out there and get some really good photographs of your dinghy and of those belonging to other dinghy cruisers. Don’t be shy, if you think they are ‘good’ shots, then enter them for the Dinghy Cruising Association photography competition. Details on the DCA website, given at the start of this blog post.

Good luck now, fair winds and see you out on the water.


Thursday, 6 April 2017

Retirement learning curves and a video of a welsford navigator sailing!


I used to write, lots. Educational stuff, mainly for journals and it was generally well received - both the geographical and educational content. I didn’t earn anything but some journals had a high profile and it was the kudos of being academically published I guess. I just enjoyed doing it.

So, I’d like to try my hand at travel writing, not books, but small, odd articles, for a magazine or a Sunday supplement. I’m under no illusions that it will be hard and that I may be no good at all but if you don’t try, you don’t know and actually whether it gets published or not is frankly immaterial to me. The process of learning how to write, to self-critique, to search for a style, to create………that will be enjoyable enough. And you have to start somewhere!

 I want to start a new blog as well; to run alongside ‘Arwen’s Meanderings’ with direct links between the two. It will be a travel blog, its sole aim to encourage, support, inspire people to travel and meet others, to have micro-adventures. And I think we have an idea for launching it to. By ‘we’ I mean me! ‘Her indoors’ is less enamoured with this idea! ‘We’, are thinking of trying to do 14 holidays in one year around Europe for under £2500. It stems from an article we read a few weeks ago about a twenty-six-year-old who, working in a high-pressure job in London, felt he needed to maximise his downtime and so embarked on trying to do as many mini breaks as he could across Europe without taking time off!

  ‘We’ have rules for this engagement too although they change frequently at the moment. Each trip can only be 4 days long or less. On each trip, we have to pack in as much ‘free stuff to do’ and ‘cheap’ activities as our poor bodies can take. So far so good – ‘her indoors’ is onside. “No posh hotels – hostels, cheap Airbnb rooms whatever, but no ‘nice’ hotels! We have to step outside of our ‘travel comfort zone’ on occasions”. And there it was when I lost her! Don’t get me wrong, ‘Her indoors’ is a good, accomplished traveller in her own right; she’s slummed it and suffered travelling hardship and deprivation on many occasions. But I sense she is expecting something just a little more. When she retires, she’s wanting a little bit more than a hostel floor in the middle of a mosquito ridden swamp or a smelly drop pit toilet in the deserts of Namibia!

Although the blog will be for all age groups, our (my!) real target audience is our age, the fifty somethings. So, nightclubbing in Ibiza, cave tubing in Slovenia, grape picking in Italy, kite surfing in Sicily, a painting course in Paris, rowing down the Danube……..well it’s an idea! It needs refining!! A lot of refining according to ‘her indoors’.


I think I might take up vlogging as well. I have no idea why but I like editing films. Hopeless at it, never been trained, no idea what I’m doing! My YouTube channel attests to that! But I have young friends who are playwrights and script writers so I know where to go for tips and ideas and why should all the twenty somethings have vlogging to themselves?

 I want to create a channel with short videos of my micro-voyages and travel micro-adventures. More face to camera work, videos with a story to tell, a purpose. ‘How to’s’, ‘problems encountered and solved’ ‘tips’, if any, ‘suggestions and reviews ‘, ‘learn from my mistakes’ type features. I want the channel to inspire and encourage others to travel, build boats, sail, break out, pursue their dreams and ambitions, take up something new, explore; generate discussion, provide a little interlude in people’s busy, busy lives; I want it to promote my wonderful ocean city and be full of laughter, fun, warmth, humour and passion; passion for learning new things.

A tall order and I have no idea why I want to try it. I don’t even know that I have the skills or attributes to make it remotely work or of value to anyone but it’s worth a try. Nothing was ever achieved by doing nothing and if no one ever subscribes, I will still have been on a learning journey and that’s half the fun.

In the meantime, my Youtube learning curve remains exponentially vertical……today it was learning how to put in annotations. ‘Cards’ they call them and ‘subscribe’ links. I have no idea whether they work or not, whether people will like them or not. I guess it is one of those ‘suck it and see’ moments!