Arwen's meanderings

Hi everyone and welcome to my dinghy cruising blog about my John Welsford designed 'navigator' named Arwen. Built over three years, Arwen was launched in August 2007. She is a standing lug yawl 14' 6" in length. This blog records our dinghy cruising voyages together around the coastal waters of SW England between 2009 and 2025.
Arwen has an associated YouTube channel so visit www.YouTube.com/c/plymouthwelshboy to find our most recent cruises and click subscribe.
Although 'Arwen' has now been sold to another family and is sailing in new water, this blog will remain a source of inspiration and information for those interested in dinghy cruising and sailing the local waters around Plymouth Sound. So, continue to drop us a comment or ask a question and happy sailing and fair winds to you. Steve and Arwen
Steve and Arwen

Thursday, 8 August 2019

New shrouds

Dyneema seems to be the way to go and the chandler assured me that 5mm diameter would be ample. So I went ahead and managed to obtain some end of reel cuts - slightly assorted size lengths but the same colour - they were bundled and on the 'off-cuts' table - discount price.

Of course, none of the lengths were the 'right' length and so some fiddling around was required.

On the other hand, when tightened up by lashings there was a rather satisfying twang to the shrouds - barely any give or slack at all and so I am assuming the slight sag in the fore-stay will now disappear.

It's a BIG assumption. But next trip we will find out.

New shroud telltales as well

Not pretty but I think they will work 

Tuesday, 6 August 2019

a shroud booboo!

It seems I have made a bit of a mistake - ignorance is bliss as they say - a mistake that shows my lack of boating and seamanship knowledge.

I made some new shrouds for Arwen out of three strand hemp and apparently that stretches too much and is likely to break under stress. It only has a breaking strain of around 380 lbs and is completely unsuitable for this job.


Go figure. I never knew this. I should have.

I wouldn't have made such a mistake as a climber where not knowing your equipment and ropes well enough -  is the difference between life and death.

Truthfully, I'm feeling rather stupid and rightly so. I have no idea what possessed me to make such a stupid, ill-informed decision. Pride in making a reasonably decent first ever eye splice, has for the moment, evaporated.


What a numpty!

More numtifying, is the fact that I am replacing the old hemp shroud lines - they have been on Arwen for three years with no problems. Yes they occasionally slacken and I used an old system of pulley blocks to tension them up whilst at sea.

This easing of the shrouds goes some way to explaining why Arwen doesn't always point close to the wind - saggy fore-stay apparently - I never realised I suffered from the affliction - go figure again! Steep learning curve.

So, I have been doing some research and in wanting to avoid wire, dyneema seems the way to go. Terribly strong and non stretch.  Massive breaking strain on just 4mm diameter. So, after a little more reading, if nothing untoward turns up, I shall sneak down to the chandler once more and get some more thimbles and this time dyneema.

I want to avoid shroud plates and use lashings if possible to secure the shrouds to chain plates - so that will need further investigation.

If you have experience of using dyneema shrouds and can offer any tips and advice, I would love to hear from you, in the comment box below. Take pity on a poor sailor - drop me a comment - and thanks in advance.

Now what do I do with the shrouds I've just made - answers on a postcard please to........Mr Numpty


Postscript:
I'm also using the hemp as the main halyard for my mizzen sail. I tend to keep it permanently up and rarely lower it. When I don't need it I tend to release the mizzen sheet and then use sail ties to pull in the sail against the mast. I leave the small battens in.  Now I have never had a problem with this but then I have never sailed in anything over a force four - I have experienced gusts of 25kts plus though. The system seemed to work OK in a rather breezy outer Salcombe estuary earlier this year as well. But, I suppose I had better replace this as well - if anyone has a view on this let me know in the comment box below. All advice gratefully received as always. 

Monday, 5 August 2019

North Sea to Black Sea - an interesting adventure

I came across this interesting adventure today - worth following I think - good luck to them both - I like ambition in young people.

Their blog is

https://totheblacksea.com/

One of their YouTube videos is this one...


Discovering my old planning scrapbook for Arwen

When I first decided I would build a navigator back in 2007 or so, I researched everything I could find about the design online.


I printed off pictures and comments about the boat in various forums.


 I contacted people by email and asked for their views.


I annotated pictures, found paint charts and spent ages poring over plans.


I visited little wooden boat shows like Beale Park and took photographs of boat features I liked and might replicate on my navigator build.


I drooled over the build photo files of Barrett Faneuf.  I dreamed about Dave Perillo's 'Jaunty'. I was fascinated by Wilhelm's build.


Anyway, as you can see, clearing through the study and tidying up shelves I found the 'ideas pre-build scrap book'. I can't find the build photographs of Arwen - they are around somewhere in a separate album and will turn up eventually.


Brings back lots of memories of happy evenings after school work spending an hour or so late in the evening when the family had gone to bed - collecting photos and annotating them with random thoughts.


30 pages of annotated photographs and scrawls - a few hours pondering and many cuppas - went into this scrap book

Saturday, 3 August 2019

Some tiller and rudder adjustments

Sometimes something happens for which you cannot account. Take, for example, my rudder. For nine years the rudder down-haul has worked perfectly and then for no reason that I can discern, it suddenly stopped working on the recent Southpool Creek trip and I had to keep leaning over the transom to push it down in to place - extremely irritating I might add.


Not bent, not jammed, didn't hit the bottom with it. Ropes all move freely. It just stopped working of its own accord.

So today a little rudder TLC and whilst I was at it I made some adjustments to the tiller as well.

Firstly, I re-threaded the down-haul and moved one eyelet where it secured it to the base of the rudder tiller  stock.

And hey presto, with that one small alteration, it started working again - go figure!

The addition of an extra eye guide at the base of the rudder stock made all the difference but don't ask me to explain why - I genuinely have no idea - but it now works again and that is the main thing

On the tiller, I moved one or two cleats to new positions to make handling of down-haul and up-haul easier, filled in some screw holes with wood filler and installed a new metal eye for the tiller tamer.
The old eye was beginning to cause the tiller tamer rope loop to jam - again for no particular reason I could discern - wear and tear I guess.


It's nice to potter for an hour or so in the workshop, aka the garage, doing odd little jobs. Makes me feel all happy and productive - how weird is that?

The big white plastic eye has been removed and the new silver circular eye replaces it

The black cleat has been moved from on top of the tiller to the new side position, allowing the extension pole to sit better on the tiller top when not being used. 

Tuesday, 30 July 2019

building wooden oars for a sailing dinghy 11 - Leathering oars recipe

Take two pieces of leather and punch holes at 1 cm intervals around 0.5 mm back from the cut edge. Soak in warm water to soften, stretch and allow to dry in the sun.


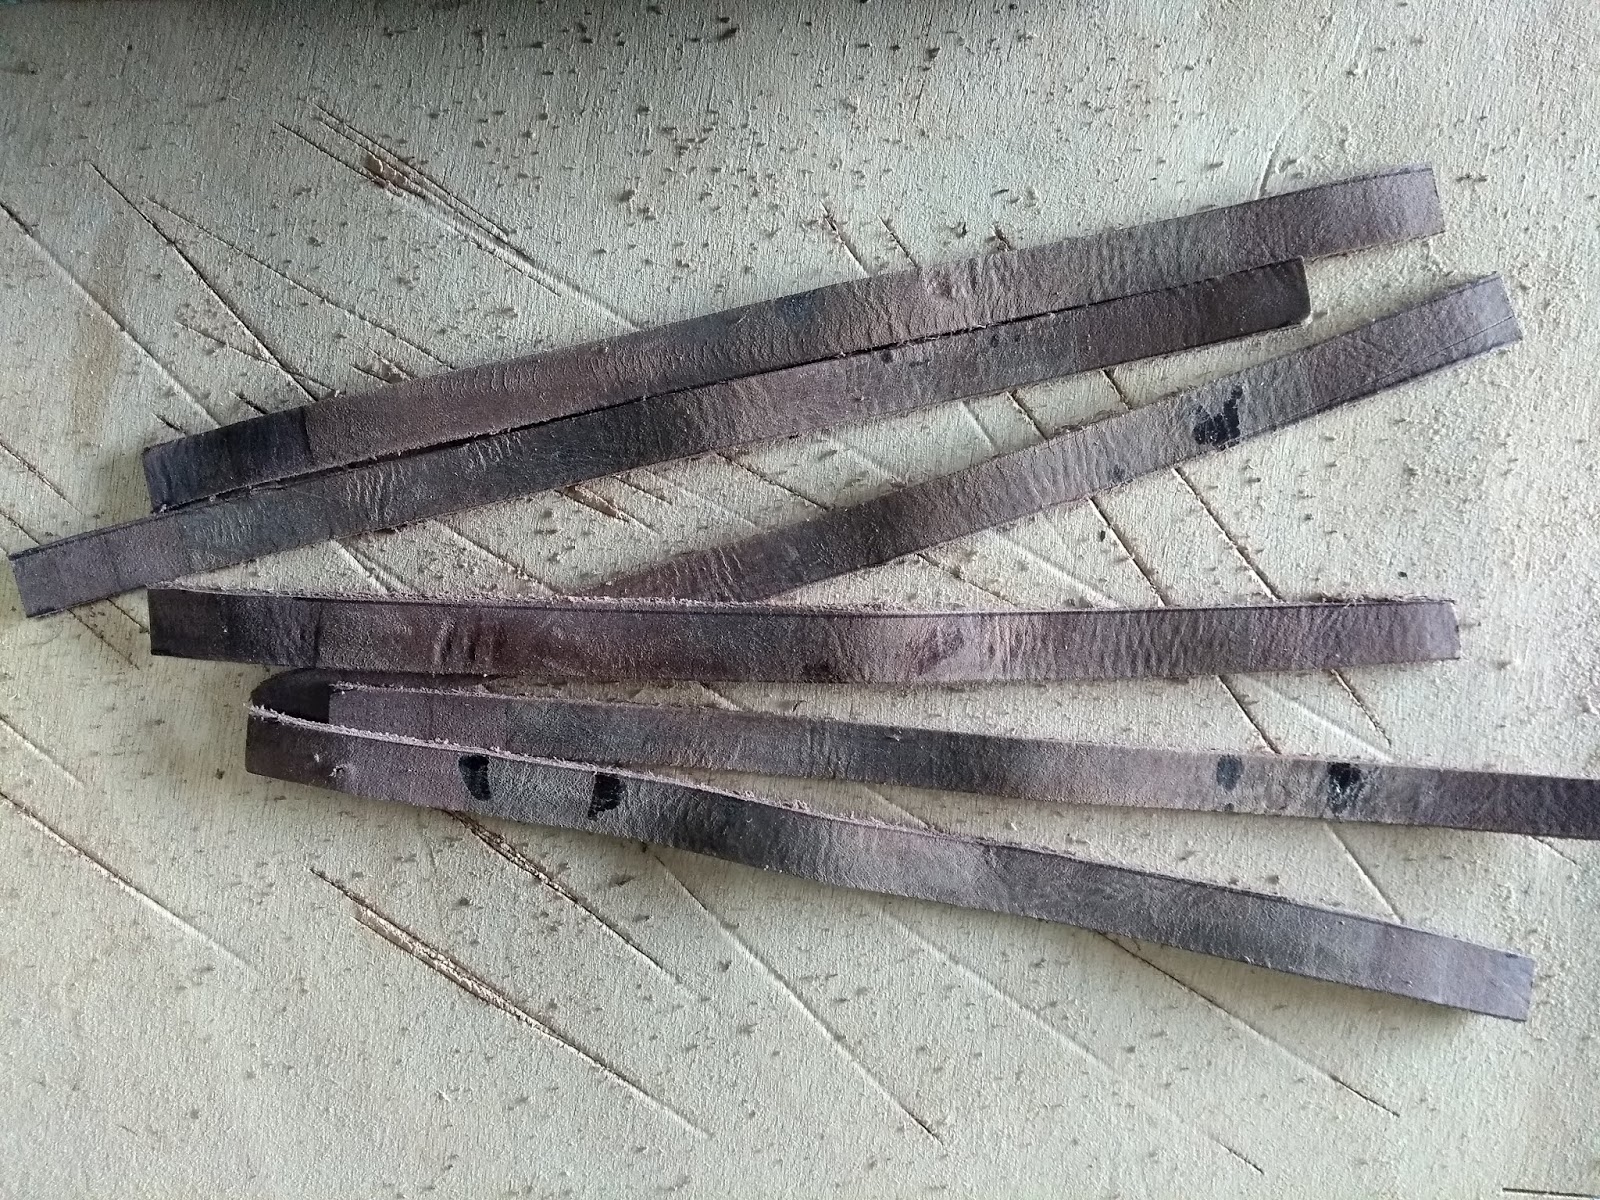
Cut two pieces of softer leather into 12 mm wide strips, place in warm water to soften and dry off in the sun.


Do some maths - width between rowlock centres is 60 inches. Divide by 2 = 30 inches - add 2 inches to each length = 32 inches. This is the centre point for positioning the leather on each loom.

Mark position on looms and slightly abrade with fine sandpaper.

Now position the piece of leather correctly. Apply glue to both inside of leather and the loom and allow to go tacky. Whilst waiting, cut waxed twine to appropriate lengths and thread two needles.


Then insert needles into one hole either side - knot the ends together and then start stitching, tightening the stitches every so often - pulling the leather tight together. At end, tie off the two pieces of twine with a series of reef knots.

Take wooden mallet and gently tap the stitching down in to the leather so it doesn't stand so proud.

Now glue strips and loom and tack one strip alongside top end of the loom leather piece. Wind tightly and then add more glue, allow to go tacky and add next strip. Every so often add a small tack pin to hold in place. Six strips later, tack the last end in place and rub away any excess glue that has escaped from the sides.


And leave to dry thoroughly before use.

In the meantime, use any off-cuts to leather the rowlocks


Monday, 29 July 2019

building wooden oars for a sailing dinghy 10 - Getting the leather ready for wooden oars

Strips are cut to form buttons


Leather has been cut to size and hole punched ready for the twine


Now they need to be soaked and stretched before applying to the oars 

building wooden oars for a sailing dinghy 8

The oars have been painted - three undercoats and two top coats - that should do.


Now, they have to be positioned in the rowlocks and this position marked off ready for locating the protective leathers.

Just enough to do both oars

Can you smell that leather - wonderful........

I'll leave it a few more days for the paint to thoroughly dry before doing this last job. I should have just enough leather to do the protective sleeves and some strips left over to build up some protective strip button stops - my technical name for them - basically the rim of those black plastic oar collars you can get.

Final verdict? They will pass the 'look great from 20 feet away' test. Rustic rather than professional. A good bit of carpentry learning...which to be honest.....I won't be repeating in a hurry again!


My oar making journey

Bought CLC  plans

Drew out the templates

Cut some thin ply templates

Glued up three pieces of douglas fir

bought some new tools.....well.......to show respect to the wood you know.......

hand cut out the two oars because the band saw couldn't do it....and three days later 

....started shaping the oars and creating piles of fantastically smelling shavings

and the planing and spoke shaving continued...........


....until eventually oar shapes emerged and I was at risk of making them too light and too thin......

three undercoats later


and two final top coats........

Voila! A pair of rustic looking oars - in perfect keeping with the state of poor old Arwen


Sunday, 28 July 2019

Some of the scenes along the south west coastal path around Mt. Edgecumbe in SE Cornwall

I live in a stunning part of the UK

Within Cawsand Bay


Looking along the breakwater towards Bovisand


Pretty Cawsand and Kingsand


Nature along the footpath 


Cawasand Bay 


The iconic Plymouth Hoe in the distance with Smeatons Lighthouse tower

Passing Devils Point at the entrance to the Hamoaze

A Ferry port to France and Spain

The Royal William Yard - once the navy's victualling yard at the time of Nelson 


Passing the orangery in Mt Edgecumbe House gardens 

Plymouth - Britain's only Ocean City