Arwen's meanderings

Hi everyone and welcome to my dinghy cruising blog about my John Welsford designed 'navigator' named Arwen. Built over three years, Arwen was launched in August 2007. She is a standing lug yawl 14' 6" in length. This blog records our dinghy cruising voyages together around the coastal waters of SW England.
Arwen has an associated YouTube channel so visit www.YouTube.com/c/plymouthwelshboy to find our most recent cruises and click subscribe.
On this blog you will find posts about dinghy cruising locations, accounts of our voyages, maintenance tips and 'How to's' ranging from rigging standing lug sails and building galley boxes to using 'anchor buddies' and creating 'pilotage notes'. I hope you find something that inspires you to get out on the water in your boat. Drop us a comment and happy sailing.
Steve and Arwen

Tuesday, 31 December 2019

Happy New Year

Wherever you may be, whether you be sailing or not, Happy New Year to you all and may 2020 bring all that you desire.


Monday, 30 December 2019

Sorting what I carry and where I store it

One of the things I must do is go back through what I carry on-board Arwen and re-think where I store it all.

Back in May 2010 I stored things like this
https://arwensmeanderings.blogspot.com/2010/05/getting-arwen-organised.html

Recently, I have been storing things like this...


I'm sure I carry way too much.

Saturday, 21 December 2019

Some of the posts from 2019.......

May I wish you all a Merry Christmas and a Happy New Year.
Over the festive season, if you need a quick fix of dinghy cruising nautica, here are some of the posts from 2019.....

I managed to sail up two rivers without resorting to the outboard. I started to learn some canvas work skills, built a set of oars and reshaped the yard and boom. I added five new videos to my YouTube channel at
www.YouTube.com/c/plymouthwelshboy

I saw plenty of wildlife, visited some lovely traditional boatyards and met wonderful new people.

Anyway, have a wonderful festive break - see you out on the water in 2020.


Finally in print
https://arwensmeanderings.blogspot.com/2019/12/finally-in-print.html

Sailing back from the river Yealm
https://arwensmeanderings.blogspot.com/2019/09/returning-home-from-river-yealm-in-john.html


Making a sailors ditty bag
https://arwensmeanderings.blogspot.com/2019/08/making-sailors-rigging-ditty-bag.html


Making new shrouds for Arwen
https://arwensmeanderings.blogspot.com/2019/08/new-shrouds.html

Note: these are the old shrouds - I made new ones out of dyneema

Building a new pair of oars - part 11
https://arwensmeanderings.blogspot.com/2019/07/building-wooden-oars-for-sailing-dinghy_30.html


Sailing up South Pool creek
https://arwensmeanderings.blogspot.com/2019/07/sailing-up-southpool-creek-at-salcombe.html


Charging a VHF using portable power banks
https://arwensmeanderings.blogspot.com/2019/06/charging-vhf-radio-using-portable-power.html


A day sail around Plymouth Sound
https://arwensmeanderings.blogspot.com/2019/06/dinghy-cruising-welsford-navigator.html


Getting great photographs of your boat out on the water
https://arwensmeanderings.blogspot.com/2019/05/getting-great-photographs-of-boats.html


Safety considerations  - what do you carry in your PFD?
https://arwensmeanderings.blogspot.com/2019/04/dinghy-cruising-and-personal-safety.html


Making galley boxes - an update
https://arwensmeanderings.blogspot.com/2019/02/dinghy-cruising-galley-box.html


Friday, 20 December 2019

Finally in print

I have over the years had a number of articles published in educational journals; I've contributed chapters to some books as well.  But never until now have I written anything non-educational that has been published before.

Part One with part two to follow in the spring bulletin. I hope people enjoy it and that I haven't wasted their time or pages in what is an outstanding magazine.

It took a lot of coffee inspiration 

But here we have it - six pages in a brilliant magazine


Sunday, 8 December 2019

Boat trailers

Arwen's boat trailer is 10 years old and still going well. There have been several bearing changes and three sets of tyre and inner wheel changes as well over this time.

The trailer was designed for a rib and is extendable from 14 - 21'. I got it at a very knock down price, which was all I could afford at the time.

The problem with the trailer is its design. The hard rigid plastic rollers play havoc with the lapstrake design of Arwen's hull and so the paint regularly gets slightly damaged and flakes off leaving grey patches on the bottom planks and hull base.

Thank heavens, there were three top coats, three undercoats and three grey coats over the fibreglass!

Cut to the chase - I saw this picture of a trailer for a navigator, Now I am wondering whether I could remove the side rollers and replace them with bunk planks?


Thursday, 5 December 2019

Winterising Arwen

Winter is coming.......chilly winds, frosts, damp fogs.

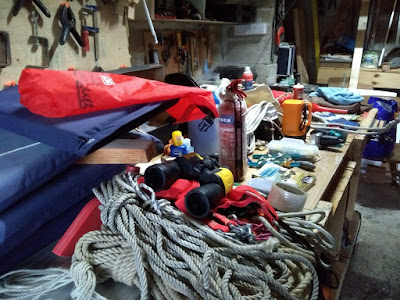
Arwen has been winterised. I was holding out for a December/January sail or even an overnight up Frogmore Creek at Salcombe but its not looking promising. Even with a new tarp cover, moisture is building up in her cockpit which always leads to mould. So everything is now on the work bench in the garage and all the damp has been wiped out of her. If I go for a New Year sail I will just have to put time aside to re-rigging her again.

This is what happens when others fill your garage with 'stuff'. 
You end up having to use your work bench as a storage place!!


In the meantime, one article has been submitted; the other one is being drafted now and hopefully will be dispatched next week. Then a short break and a few more for the spring. Writing sailing articles is a new venture for me. I've written for plenty of educational journals before but that's an entirely different style and format. Steep new learning curve! I'm not feeling very confident but going outside your comfort zone is always a good thing to do once in a while.

Hopefully a toasted tea cake covered in Marmite will fuel inspiration

Thursday, 28 November 2019

Making a GoPro camera roll

I've been planning on making a new Gopro camera roll for carrying everything when we go on our long distance travel adventures. I could have bought one for around £26 but I've managed to make one for £14 using off cuts of material I had lying around.

Having done one of my infamous 'sketch it out roughly' A3 annotated drawing plans I then collected materials


  • red outer cordura material - waterproof
  • inner ripstop material - orange
  • soft fibre filler material 
  • wax thread
  • two buckle clips
  • two D rings
  • 1.5m of webbing 25mm wide
  • edging fabric 20mm wide x 2.5m
  • foam 6mm thick, cotton backed 35 cm x 26 cm
  • rough felt fabric - black
  • black acrylic fine netting
  • black elastic 25mm x 1m
  • black elastic 10mm x 1.5m
  • velcro 5cm x 20cm
  • velcro 20mm x 50cm
Dimensions of the roll - it is 86cm long by 26 cm wide.  The box is 26cm long x 10cm wide x 5.5cm depth. 

Step 1: cutting the rip-stop orange thin sailcloth to size - 88cm x 56 cm.  
Step 2: taking the thin foam stuffing and laying it in the middle of the rip-stop cloth and then stitching it inside to form an oblong 86cm x 26cm. the extra was to allow folds along seams which were then double stitched on a sewing machine. 


Tip: stitch down the middle as well - I didn't and it proved a right pain later on as the cloth kept moving. Encase all the white thin filler - think sleeping bag with stitched up entrance. 

Step 3: turn the padded material over so that the central seam lies flat face down. Now mark out where netting, elastic loops, storage box etc will go. The box should start approximately 20 cm in from one of the ends. Mark out a rectangle 10cm wide across the width of the cloth at that point and stitch onto the padding three strips of velcro - each 24 cm long. 

Step 4: make the box out of the foam - I cut it as a fold up template - the end pieces had small flaps each side which could fold in and be stitched to the longer side walls. When the template had been cut out I then covered it with the black cloth and stitched it all around the edges. The rough template is shown on the photo below.  I then cut away excess fabric up to the stitch lines and then folded the box into its final shape - stitching each corner carefully. 


This photo above shows the box. 
Note how I also stitched at each end a strip of the outer waterproof material. 
The ends of the box are exposed in the roll. I also stitched a strip of velcro on each side end as well to hold the fold over flap in place (see later photographs) 

Step 5: I made two small black cloth covered foam dividers for the box - each one having velcro tabs at the end which stick to the cloth material. these dividers can be moved about or taken out allowing you to create different sized spaces in the box. 

Step 6: As you can see in the photo above I stitched immediately next to the box two pieces of 25mm wide elastic to hold a GoPo extension selfie pole. Depending on the selfie pole you have - you may want to stitch in a third strip as well. 

The photo above shows the velcro strips where the box will stick, the elastic strips to hold a selfie pole and then a long central strip which has been stitched into loops. This strip is around  40cm long. As you can see in the photograph below it holds screws, small extension arms, flat bases and clips. 

When stitching in this longer middle strip of elastic for loops - I made sure that I put in the thing I wanted stored, stretched the elastic over the top of it and then marked where I would need to stitch to create the other side of the loop. 

Step 7: creating the elastic nets. How many pockets you have is up to you  - check the dimensions of the things you want to store in it. I stitched the elastic to the netting first - making sure that at each end there as at least a 1cm folded over strip to act as the pocket end.  I then marked on the position of where I wanted the pocket netting to go and started stitching from the box end.  I stitched one side and then measured out the pocket size before stitching that end of the pocket; I then measured the next pocket size and then stitched its side and so on until all the pockets were done. I kept slight tension on the elastic to make sure the pocket entrances were 'tight'. 

Note: I also made sure that the depth of the pocket mesh material was sufficient that I could fold it over the edge of the foam pad and stitch it on the rear. 


Step 8: when I had stitched everything I wanted to the foam base pad, I then stitched the pad to the outer red cordura material. It helped by using dress making pins to position and then hold the material to the foam pad. By now the sewing machine was struggling so i switched to my speedy stitcher and wax thread. Note there should be a 1 cm surplus of red cloth all the way around the orange foam pad - this will be folded over the edge of the orange foam pad in the next step.


Step 9: when the red base had been stitched to the foam pad, the 1 cm edge strip is folded over and stitched in place thus protecting the stitching edge of the foam pad. After that, the black woven tape edging material is then folded over the edge of both the red outer material and the orange inner material and stitched in place. I started at one end and just worked my way around. 

Step 10: I stitched the buckles at the opposite end to the box. the outer clip tapes need to be experimented with and then stitched in the chosen locations. 

At the end, here is the finished item - the stitching isn't neat but it is strong and so I'll settle for that. 
The contents are protected and secure. It isn't a fully waterproof pack obviously but it has all that I might need for a quick trip. 


Note the D ring loops at each side. When rolled up - you can attach a webbing shoulder strap
Also note how the far end is left free so that it folds like a flap over the box to act like a lid. The flap has velcro which seals with the velcro strip on the box. 


So, what do I carry in this GoPro Roll? 
  • a selfie stick
  • two GoPro Hero 5's
  • 7 spare batteries
  • battery charger and cable
  • two strap mounts
  • one cycle bars mount
  • one tripod mount
  • 4 large and 4 small extension arms
  • two base clips
  • a helmet strap
  • memory cards
  • a SLOPES GoPro holder
  • mini tripod
  • two spare sticky mounts - flat and curved
  • spare charging cable
  • three string security cables
That's enough of most filming situations. No more grappling around in various bags and pouches. It just drops in a dry bag or rucksack. It unrolls and rolls in moments. 


Monday, 25 November 2019

An autumnal walk from Cotehele to Calstock

Misty and drizzly but warm. Lovely walk.


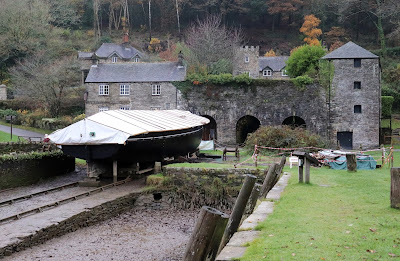
'Shamrock' finally free from her refurbishment tent

Cotehele Quay

Looking downriver

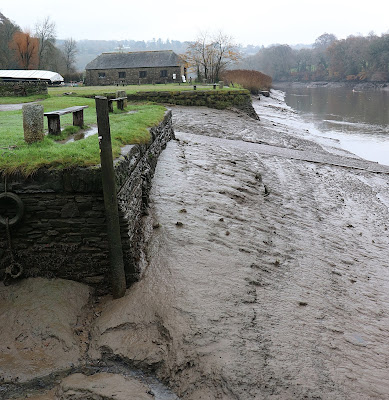
Muddy berths 

Beware when you tie alongside 

Deeper water and flatter bottom alongside the furthest most quayside

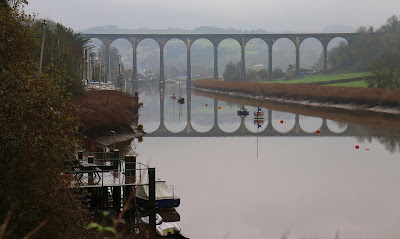
Looking upriver towards Calstock 

A visiting boat at low tide


Calstock Quay looking upriver towards Morwellham

Looking upriver from Calstock Boatyard

Looking downriver towards the boatyard

Residents

Local artistic talents 


At the boatyard - central river channels - lovely overnight on-board dinghy cruise stops 


At the boatyard


The last bend before Calstock to the left

Autumnal colours in the woods

Looking downriver to Halton Quay

Stunning garland at Cotehele House above the quayside