Arwen's meanderings

Hi everyone and welcome to my dinghy cruising blog about my John Welsford designed 'navigator' named Arwen. Built over three years, Arwen was launched in August 2007. She is a standing lug yawl 14' 6" in length. This blog records our dinghy cruising voyages together around the coastal waters of SW England.
Arwen has an associated YouTube channel so visit www.YouTube.com/c/plymouthwelshboy to find our most recent cruises and click subscribe.
On this blog you will find posts about dinghy cruising locations, accounts of our voyages, maintenance tips and 'How to's' ranging from rigging standing lug sails and building galley boxes to using 'anchor buddies' and creating 'pilotage notes'. I hope you find something that inspires you to get out on the water in your boat. Drop us a comment and happy sailing.
Steve and Arwen

Sunday, 27 November 2011

lazy jacks on small boats and some advice

My friend who owns a post boat has had something to say about the Lazy Jacks on Arwen. And he should know because he has sailed her often enough. He made some good points actually. He summed it up like this


“the problem on ARWEN when you drop the gaff is that the balance of the gaff on one halyard is to the rear, hence the peak (outward end) falls first, and because it now has no other restraint on it as the sail has ballooned, it swings out or any where it wants”.

That’s about the best summing up I’ve heard of the problem!

He went on to suggest that maybe looking at his boat might help. It has two halyards. One is at the peak; the other at the throat next to the mast. Using the two halyards to control the fall of the yard, you force the descent of the throat first. This has the effect of ‘brailing’ (furling the sail towards the mast). He points out that this is often seen on big gaff rigged boats such as Humber Yawls, Norfolk Wherries and Thames Barges. Once the power is out of the sail and the throat starts to descend, the peak halyard can be released in a controlled fashion as the leverage on the gaff has moved forward due to throat and sail falling. All being well, the result should be that the whole lot should fall between the lazy jacks. He does finish by saying “Well that’s the theory anyway”.

So....option one – get another halyard running......which is interesting because I’ve just discovered something on the plans which I never noticed or checked before. My mast builder put in one sheave in the mast top. On John’s plans, there are two! Oops!

Osbert has never found the lack of topping lifts to be an issue on his Walkabout  balanced lug main. He always use the mizzen (and/or sea anchor) to keep her head  to wind while lowering the sail and then lashes the sail, yard and boom together with the tail end of the downhaul. The thought of more lines to get tangled up in fills him with horror! Horror? Osbert my friend, you have no idea what ‘lazy jack horror’ is until you’ve been with me on Arwen!

Hajo had this to say:

“Balanced lug sails have the same issue. I used the following lazy jacks’ setup on my mixer2 (That's a 12 ft boat). It handled it fine; so it shouldn't be an issue on Arwen”.

He suggested I look at this link which took me to this image below:

> http://www.duckworksmagazine.com/06/howto/junkrig/lazyjacks.htm


copyright duckworks and original author

Quite a nice simple arrangement actually.

Robin suggested this arrangement:

“What I ended up doing was putting a double block at the mast head; I then fed a line which acted as a topping lift for the sprit and as a lazy jack for the topping lift side. So the line went from 1/3rd of the way back from the boom end (anchor hitch) up to one side of the double block and back down to the sprit with another anchor hitch1/3 rd aft of the mast. You now have a triangular looking line that holds the sprit up when you drop the main and prevents the sail and gaff from spilling over the port side ( I have my sprit on the port side of the mast). I then put another line through the other side of the double block starboard side of the gaff and sail down under the foot of the sail and then up on the port side of the sail to the sprit and then tied off to the same points as the port side topping lift. This provides two lines to catch the sail when it is dropped at the foot. When you lower the main, it is caught by the two lazy jack lines and is constrained by the two lazy jacks to starboard and the topping lift to port. The gaff likewise will come down within these lines. Tighten the main to stop it all swinging around and then when you are ready you can sort the sail up and tie it up properly”.


Yet again, my friend, and forum members come to the rescue of an amateur in all sense of the word. Thanks guys. Ho hum!! We live and learn.......and I’m a great advocator of ‘life-long learning’. I just wish, sometimes, I could learn a little less, a lot faster, with less pain and humiliation!

Steve

PS I will get around to thanking you all in person via email..when I've waded through lesson planning and 'A' level marking. I just posted this quickly as a break to save my sanity. Thanks guys.

Saturday, 26 November 2011

A 'Stacey' motovespa update

So where are you with ‘Stacey’’ someone asked recently. A good question I thought. Progress on ‘Stacey’ has stalled slightly after some of the big setbacks already reported in the blog. Let’s think.....


1. A motor scooter specialist MOT guy has confirmed that the floor welding is solid and secure and he’d pass it MOT no problem.


2. Our welder/fabricator reckons he can cut a piece of aluminium the shape of the missing leg shield section and weld it without Damaging the existing paint work.


3. Our sprayers have some of the original spray left and are happy to spray a small section and match it in as best they can.......good job it will be hidden by front mudguard

We have enough spare paint to gently touch up the odd scratch and although we will see instantly where we have done so, anyone not knowing would have to get within a foot of the scoot and know where to look before noticing any touch ups....so that’s good news.

So what about the engine I hear people ask?

Ah. That could be a different issue altogether! You see we have several little issues here and the problem is our lack of experience doesn’t give us any prior knowledge to operate from. Basically we don’t know what things should be like. So, issues from the top are

1. When the rear wheel hub is off the brake arm moves and the brakes expand no problem. When the rear wheel and hub are put back on that arm will not budge a mm. Everyone said we had the wrong brake pads sent to us by Beedspeed. Al at Beedspeed says they are the right ones. We ordered a new set from Allstyles – and same problem! So that needs looking at


2. Gear selector movement seems to be stuck to two positions only – so that needs checking


3. The clutch arm has some play in it and then reaches the end of the play when it becomes completely solid. I don’t know whether we should feel pressure as it depresses the clutch plates or not – so that needs checking


4. The exhaust fitting to the main engine arm is an odd one and if used leaves barely 5mm gap between fixing and front wall of tyre – too close if you accept tyres expand when warm. So we are using a car exhaust U clamp which holds it really securely and gives greater clearance but doesn’t really look pretty

And then there is the slight shock a friend of ours has given us and this is where we’d like some views or comment please! He saw the letters PK on the flywheel and wonders whether or not we have a PK engine in a motovespa? Now being green as grass we wouldn’t know the difference.....so from the photographs below – can anyone tell us whether it is a PK engine or not? Or can you fit a PK flywheel to this kind of engine? The engine number matches what you’d expect for a motovespa of this age....so? Any views – we need all the help we can get.

In the meantime, a real nice gent from one of the vespa forums who lives not far away in Cornwall has offered to take a look at the engine if we pop down and see him one Saturday. A generous offer and we’ll be taking him up on it. There really are some great, kind people out there aren’t there.

Steve
Below are some photographs of the engine in original condition, stripped and reassembled

restored but have we done it right?

the old flywheel has PK and a number on it - so is this a PK engine?

The new exhaust with a problematic engine arm fitting bracket

the gear shift arms which seem to have only two positions

inside after we had stripped it all apart and water blasted it clean

we followed an outstanding tutorial given to us on how to put these back together correctly - we followed it precisely

all seals replaced with new ones

all bearings replaced


new clutch plates soaked in oil and later inserted correctly

someone did a malossi conversion of some form

the casings split, stripped and cleaned up

before we split the casings

our first look inside

when it first came out of the frame


Thursday, 24 November 2011

lazy jacks on small boats with standing lugsail arrangements

Lazy jacks......they are occupying too much of my mind at the moment. When you have limited brain cells and a short term memory problem, then this is not a healthy use of the tiny cells. Especially with A Level marking and module preparation lurking in the wings! Then there is the continuing saga of ‘Stacey’ our motovespa restoration (just don’t get me started on that one).


Arwen’s lazy jacks don’t seem to be working as I’d planned. No surprises there really. Nothing I plan ever actually works in reality! When out sailing last week the forward end of the upper yard managed to go the wrong side of a lazy jack (I’m still trying to work out the physics momentum that allowed it to happen) with some serious consequences; namely the mainsail didn’t fully lower. In fact it got jammed half way down the mast and involved some jumping up and down and severe arm stretching to ‘bounce’ the yard back down the mast. Fine when you have a very competent sailor guest on board who can steer Arwen into the wind. A complete nightmare if I had been single handed! I also noticed that after tacking the top yard had managed on several occasions to move from its normal starboard side of the mast to end up on the port side of it....so it had managed to ‘dip’ itself as well!

I really am a lousy sailor/sail trimmer aren’t I! I have this unique ability to overcomplicate the simple!

The original intent behind the lazy jacks was to help ‘catch the sail’ as it was lowered. I found that when lowering the sail – the upper part of the yard would come down first, rapidly, and with the slightest puff of wind, end up in the water alongside the boat. Extremely irritating! Or it would clonk me on the head...even more irritating and a test of my knowledge of welsh depletives!

Of course with the sail configuration I have it hasn’t passed my small brain that maybe my sail just isn’t designed for lazy jacks. I have this standing lug rig type sail that when you haul up the mainsail, the top yard is down in the boat and all of a sudden hauls near vertically upright – short mast tall sail type arrangement. When you lower it there is a sudden point when the top most part of the yard suddenly rushes down into the boat whilst the forward end which was facing downwards suddenly looks upwards! So maybe lazy jacks just wouldn’t work with this system anyway!

So what does my current system look like? Difficult to describe in words but I’ll give it a go. Imagine the mainsail is up.........a rope is tied off on one side of the sprit boom towards aft end near clew of sail attachment point. This rope runs up the port side of the sail, through a block attached to the mast band and down the other starboard side where it runs through a pulley block and out towards the forward end of the boom (let’s call this rope end A). Now half way down the starboard lazy jack rope is another pulley which has been tied into it using an overhand knot. Rope end A now goes upward and through this block and then down vertically to the sprit boom (at a point about two thirds of the way along towards the mast). During sailing rope end A is coiled and tied off and hangs on a cleat attached to the boom. If I pull on rope end A it acts as a topping lift and the aft end of the boom rises upwards. If I leave it alone coiled and hanging off the cleat then the system acts as a lazy jack and in theory the main sail should fold down between the port and starboard side lines. On occasions it has worked brilliantly....and then on some occasions.......it hasn’t! I can’t remember where I saw the system but I think it may have been on a postboat somewhere.
Now I could simplify the system. I could have what I call the traditional lazy jacks which seem to have a sort of ‘triangle of rope’ affair at their base which go under the boom. Each rope either side of the sail could ‘clip’ into a mast head attachment with simple carabineer clips. However, I’m sure that this system is going to foul the bottom of the sail which goes below a sprit boom...so I’d need to get around that. Also I wouldn’t be able to use it as a topping lift. So maybe I need a system where the line runs up to a block at masthead and then down the mast to a cleat. I think it would look similar to the Harken system illustrated below.


I read somewhere of another method which is similar. Start from a cleat on the port side of the mast at the step and run a line up to just above the highest point where the lower end of the top yard will rest against the mast when the sail is raised, and at that point, fix a hanging block. The rope goes through the block and back down, aft, to the end of the main boom and under the boom through a fairlead under the boom to keep the line in place. From there it runs back up to the starboard side of the mast, to a block on the opposite side of the first one, and then back down to another cleat on the mast at the foot. Now, from these main lines, splice in however many lines are needed, running straight down and under the boom and straight back up again. Ah splicing! A dark art and something else to think about!
Of course if I had any sense, I’d just ask the forum members...I wonder what other navigator owners do...and do they have the same problem of the falling sail blowing outboard? I’ll let you know their sound advice on this matter.

Steve

Tuesday, 22 November 2011

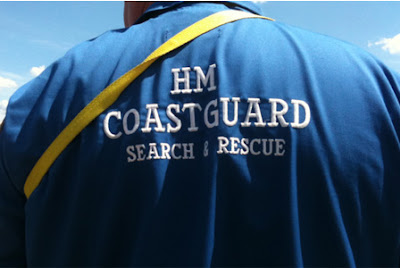
Words fail me on the coastguard cuts!

Shipping minister Mike Penning has confirmed today that coastguard co-ordination centres will be closed at Clyde and Forth; Swansea; Portland in Dorset; Liverpool; Great Yarmouth; Brixham in Devon; and Walton on the Naze in Essex; with a total loss of 159 jobs.


Did this man and his government listen to a word that was said in consultation?
Copyright photo: The Daily Mail

He told our MPs there would be ‘round-the-clock’ co-ordination centres at Shetland; Aberdeen; Stornoway; Milford Haven and Holyhead in Wales; Bangor in Northern Ireland; and at both the Humber and Falmouth in England. I think there is to be another one somewhere in Hampshire as well.


Will these still be around.....I am assuming so
Copyright: Thisisdevon

Mr Penning said:
"I understand, of course, that the closure of some existing co-ordination centres and the loss of some coastguard jobs will come as a disappointment to those directly affected. However, the decisions I have announced today will deliver the modernised, nationally networked, fully resilient coastguard service we require for the future while reducing costs."


Brixham coordinates rescues from Fowey to Exmouth including my home waters of Plymouth. I do hope they will be able to hear me on my handheld 5Watt radio down in Falmouth should I ever have the misfortune to fall over board or capsize! And I sincerely hope, what I openly acknowledge, are the outstanding coastguards at Falmouth, will have instant access to the detailed local knowledge that will help find me washed up in one of the tiny coves around my local coastline!


HM Coastguard R.I.P?

Completely and utterly daft idea....plain stupid. Enough said on the matter. Words fail me!

Well not quite. Last year the Brixham station dealt with 1,300 incidents and co-ordinated the rescue of 300 people. To all the Brixham coastguards, I know you are not yet quite gone but I want to say thank you for all you have done for us and watching out over me on my adventures in Arwen. I know your colleagues in Falmouth will do the same.....only it doesn’t quite feel the same to me or to anyone else who have been looked after by HM Coastguard Brixham.

Now it's 'nuff said'!

Steve

Saturday, 19 November 2011

lazy jacks...haven't got the right at all

Arwen is a great boat to sail and my guest today thought so too. He's thinking of building a Navigator and I think he left with very favourable impressions although I think he will definitely opt for a different rig to mine.  I have to say I really enjoyed the day. Arwen's guest was great company and an 'instinctive' sailor who was clearly very experienced. He was able to pinch her close to the wind when close hauled and she sailed really well under his helmanship through lumpy swells rolling in through the western breakwater entrance. The winds were on occasions SSE and it was an outgoing tide - so some rollers were pretty steep. He was, I think, very impressed with the way Arwen when gently over the top of them and down the other side with barely a  drop of spray coming inside the boat.

We spent the day chatting. He was able to ask questions and we discussed what went well and not so well - like the bottom bow planks and that infernal compound bend which splits planks!! I suggested he do a simple canoe or kayak first to get used to epoxy, painting etc. I know it helped me enormously with basic skills. We discussed navigators that we admired.....Barrett's Yuko, Joel's lovely teak deaks, the lovely work on Wayne's 'good enough'; the mast arrangement on Rob's Annie...and many more. I managed to find some very rare photographs of the kayak I built in practice for doing Arwen. I built it from chesapeake light craft plans. I think it turned out OK. I sold it to some guy up north who wanted to go along the canal network.


the one I did before Arwen...to get a feel for woodworking skills and using epoxy
this is the boat which had my good lady ill with laughter
she still claims it is one of the funniest moments she's ever had with me when I discovered I'd made two identifical left hand sides and so couldn't stitch them together!


as always I burned with a soldering iron some designs into the wood
I never found the website again, where I saw this picture and I've never been able to acknowledge teh artist, but it was a lovely drawing and it took me hours to copy and adapt it for buring in to a deck
if anyone knows who the artist was let me know


another pencil sketch which took ages to work out and burn in
I loved this kayak....but I never was a kayak fan

We sailed across to Cawsand bay in 35 minutes (which must have given us about an average speed of 4.5 kts or so in 14kt winds. The extra ballast in the form of said guest made all the difference and we didn't need to reef. Arwen behaved well and shot along nicely. From Cawsand it was back across to Jennycliffe and then around the front of Drakes island and up through the bridges. That was an interesting experience because the wind was SE and so we were pinching relly close to go through the bridges and avoid the dreaded dragons teeth (the WW2 antisub traps). Our guest cleared the pillars with about 2' to spare on the port side - it  was outstanding seamanship in difficult conditions. Very impressive sailing I must say.  I learned a lot today, not least of which is I still need to learn about what 'line/angles' to take ; and how to take a line/angle accounting for leeway. Our guest did it instinctively and brilliantly.

I found it really refreshing to be able to stand up, hand over the helm and potter about Arwen. I like it when my friend who owns a postboat comes with me too. He's another experienced sailor with a great instinctive feel for Arwen. She sails really well under 'experienced hands'.

We sailed for just about three hours - the tide was near a spring and dropping fast and past experience says leave plenty of time to haul her out or else you run out of ramp or hit the slime on the very end of the ramp and its spinning tyres and no grip!  We did try to go up the Plym but all that tide rushing out, well it was 'in hope of' rather than likelihood it could happen. The tide was in full swing outwards and so we abandoned the idea.

QAB allowed us to use the northern ramp on the return because another gent was trying to haul out his Corribee. If I'd known that we could have the north ramp I'd stayed out a little longer but there you go.

After our guest had departed I helped the gent out with his Corribee - a lovely lined twin fin keel boat. The tide was falling fast and he couldn't get it to sit correctly on the trailer so it was straight into thigh deep wading to help him. The water, for November, was actually much warmer than I was expecting! During the retrieval of this boat I learned how to use a rope on the tow hitch to stop your tyres going in the water....hum....wish I'd known this technique much earlier! I also started to appreciate how light and easily moved Arwen and her trailer are!

So, grey skies, lumpy rolling seas, fresh breezes, good company, probably an average of 4.8 kts ish (although I'm never good at estimating speeds) and about 5 miles sailing.

So what about these lazy jacks then?   My problem is that when I drop the main sail she belly out as she comes down.. The aft part of the top yard drops almost instantly and the forward part of the yard points skywards. A breeze will blow the sail out so that the aft end of the yard goes outside the boat and gets a dunking. I've tried lazy jacks before and they have helped control the sail as she comes down - she falls between them. However, today, the forward end of the top yard somehow went around a lazy jack and so the sail wouldn't drop properly. with two in the boat it was easy to sort out....but it would have been tense and tricky if I'd been single handed.  Which now leads to a question I need to ask John....with the sail I have - would I be able to put a gaff jaw and parrel bead arrangement on the forward end of the top yard?

In the meantime with regard to reefing a standing lug sail...in my last post I wondered how Wayne did it....and bless him he came back pretty quickly.....read his comments in the post below

To our guest for the day, I know he reads the blog...Arwen and I had a great day with  you and please come and join us again any time you are down our way. You are most welcome, thank you for such a great day out.....we really enjoyed your company and expertise.

Steve

PS I am sorry there are no photographs in posts at the moment. I have no camera..both have died and I know that photos paint a thousand words but please bear with me until I can save up to get a new camera next year. My phone camera just isn't up to the job.

Friday, 18 November 2011

reefing a sprit boom yawl rig....how should it be done?

INSHORE FORECAST FOR 19TH NOVEMBER 2011
http://www.metoffice.gov.uk/weather/uk/sw/sw_forecast_weather.html

Lands End to St Davids Head including the Bristol Channel


Strong winds are forecast

For coastal areas up to 12 miles offshore from 1800 UTC Fri 18 Nov until 1800 UTC Sat 19 Nov

24 hour forecast:

Wind South 5 or 6, backing southeast 4 or 5.Sea State Moderate or rough, but very rough at times in far west.Weather Mainly fair.Visibility Moderate or good.


copyright: passageweather.com
Plymouth is down on the south west peninsula

I must be mad!  I'm taking Arwen out in a force five tomorrow..........and that's a new one for us both!  We are having a guest on board though. Someone who is thinking of building a navigator and wants to see one, sail one and get a feel for a yawl rig.

Well tomorrow should certainly give that!
It's high tide at 11 am a 4.7 metre. Low tide is 5pm ish with a tidal height of around 2m.  We are setting off at 10.00am and will probably be out on the water for four hours arriving back at pontoons in QAB at around 2.30 ish. This should give sufficient water underneath to get Arwen out of the briny although the tide will be falling fast. 

Secretly I'm looking forward to it although I am nervous. I haven't sailed in winds like this before. I'm a tad worried about the reefing system too.  I saw how Wayne had reefed his sail below and I don't do it that way which has thrown me into a bit of a quandary.............................am I reefing it correctly?


copyright Wayne
He looks to have lowered the mainsail at the mast top; and rolled up the sail from the bottom. he doesn't seem to have reefing ropes through the sails like I do
truthfully, it looks far quicker; far simpler and less up top than the way I do it
I have a sneaky feeling I've got it wrong........again!

I have a sort of slab reefing system in which I lower the main slightly and unhook the tack down haul; which I then reattach at one of the higher reefing points. I pull the reefing line and it pulls the sail down in to some loose folds along the sprit boom. I then braille up the loose folds and tie them using the reef ties on the sail. Then I re haul the main up and tension the down haul. Now the sail doesn't really fall lower than the sprit boom - the Brailled up bit sort of lies alongside it.......so am I doing this right?  I will have to ask my guest. He is an experienced sailor so he hopefully will have some thoughts on this. But....looking at what Wayne does.....I have a sneaky feeling I've got it wrong again....if any readers can enlighten me as to the way I should be reefing the sail I would really appreciate it.

But what will our guest think of Arwen? What about those dents and dings I haven't got around to touching up; and what about that slip up where I scarfed the two rub strakes together and they split whilst setting without me realising - shambolic joint that one! She is rather rough and ready and I do love her so......but she isn't what I'd call craftsmanship like you see on Rob's, Kevin's, Joel's or Wayne's boats. They are craftsmen. Me....I sort of manage to glue it together in some semblance of a boat shape. I do hope I do John's design some justice!

But secretly, I'm really looking forward to getting out on the water. It has been tough at work, too many 65+ hour weeks. I need the break and Arwen needs the sea. She gets depressed sitting on the trailer on the driveway.....her skin turns mouldy!

Steve

PS Wayne I do hope you don't mind me poaching your photo to illustrate my dilemma.

Sunday, 6 November 2011

a funny old world

Joel has posted about his anchor pulley system as well on the same weekend. You can ready about it hear - if you remember I did say in a previous post how much I liked his method. The one draw back, or not, I don't really know, is this business of whether the wind and tide would be coming across at right angles to the boat in which case, as a good friend pointed out at dinner last night, it would place an awful amount of strain on the boat and lines....so perhaps the painter method which my friend told me might be a better solution?
I guess it depends where you anchor and what kind of conditions you experience at the time. Read about Joel's ideas at http://navigatorjoel.blogspot.com/2011/11/clothesline-anchoring-revisited.html

He explains it far better than I do!

Steve

pulley anchor system diagrams

As promised, I've tried to put the two alternative methods into diagram form. The posts about the anchor pulley system appear below on the blog or can be accessed from the side menu. One was posted in October; the other in November.


pulley system using ropes attached to bow and transom


pulley system where bow painter is attached to one side of the rope pulley loop

Being new to this, I have no idea if this is true visualisation of what various people have tried to describe to me. Comments, as always, are appreciated.

Steve

Saturday, 5 November 2011

There are some days when you wonder whether it is worth getting out of bed or not!


Stacey’, my son’s 1971 motovespa 125 super restoration is giving me such feelings! Those of you following the blog will be aware of the tragedy and sense of complete loss and bewilderment experienced by me and number 1 son when we discovered that a piece was missing from the front legshield. The story is described in this post at http://arwensmeanderings.blogspot.com/2011/10/things-can-only-get-better.html

There is an update on that story which I will share later at the end of this post but in the mean time we’ve now run into other problems and once again we must prevail on the patience of the vespa smallframes forum and hope the guys can come to our rescue AGAIN!

Conundrum one: when the rear brake hub and wheel is fixed back over the rear brake plate – the brake arm to which the rear brake cable fits, won’t budge. It won’t shift one iota. Take the wheel off and the brake arm can be pulled forward and the brakes expand as they should. You can see it happen in this short video.......


that little lever on the bottom right with the hole in it moves forwards (to the left) no problem without the hub cover on so why won't it do it when the brake drum is put back on?


So WHY is it that the brake arm cannot be moved at all when the rear hub front with wheel is placed back on? WHAT DO WE NEED TO DO TO SOLVE THIS PROBLEM?

Conundrum two: the kick start, clutch lever and gear shift arm problem.

Now neither number 1 son nor I know what should be happening but this is what we have at the moment. The kickstart won’t depress......but this could be because we haven’t got it in neutral?


the gear shifter arm....seems to have two positions and then completely stuck!

Next, as you can see on the video below, put the gear shift arm into one position and the axle rotates freely; pull the clutch lever forward and the gear shift arm moves forward and the axle doesn’t rotate.
Pull the clutch lever forward again and the gear shift arm will not move into any other positions whatsoever other than the two mentioned above – nothing – won’t budge!
Now is this normal? How do we know that things are working correctly?
(The clutch arm moves forward about 2 cm, is that correct?)


We don’t want to reopen the clutch and engine again unless we know things are definitely wrong...so vespa smallframe members...please come to our rescue again.....what should we see/experience at this point of engine rebuild? Do the video movements look right? Should we be able to move the gear shift selector all the way through several positions when pulling the clutch lever forward?


having put it all together and into the frame just to have to drop it back out again is tiresome to say the least!

It’s a real problem when you don’t know what it is you should be seeing because you have no experience to base it on!

Steve


(PS: the update on the story about the missing piece of the legshield. Well our next door neighbour owns his own gardening business and he knows lots of people and so when he heard the story he said ‘leave it with me’. A few nights later we get a ‘leather clad’ biker turning up at the door who has ‘come to inspect the scooter’. He declares it safe and road worthy. He checks the welding; he checks the brake pedal assembly plate; he checks everything. It turns out he has his own motorbike and scooter repair centre in our own fair town. He does all the MOT’s as well; ....and wait for this......he lives eight doors down the road from us! The same road, same side of the street! Whenever he passed and our garage door was opened at night he had assumed I was building another boat so he never bothered to call in......small world isn’t it!! So why don’t we ask him about the engine? Well he’s more a motorbike guy and the vespa small frame guys – well they are brill, passionate about vespas, and between them know just about everything there is to know about vespas. I’d rather check with them first. Our guy down the road, is as he says, 'there for mega-emergencies!' Let's hope now isn't one of them!).

the pulley anchor system

Well I managed to get an hour working on Arwen today. There have been so many family commitments recently that I’ve barely had any time to think about poor old Arwen. And school work? Ugh, it’s been several 70+ hr weeks in a row and it isn’t about to get any easier either....but that is beside the point.


I did manage in an hour this morning to finish putting the remaining 2 Lt soft drink plastic bottles into the side, centre and forward lockers. Regular readers will remember that having read about Robin’s story of his hatches popping off when he hit a reef, I decided to take some precautions, namely filling some storage spaces with these large bottles which won’t float out of any damaged planks or through hatch holes if water rushed in from an outside puncture and the hatches popped off due to the pressure.

I also managed to put on some old blocks I had lying around to each anchor chain so that I can set up a pulley system for anchoring off the beach. It is a simple mechanism. One end of the floating rope which will have a stainless steel clip attached to it next week, is attached to the bow ring. The rope is then run through the pulley on the bow anchor and runs until it reaches the rear anchor chain where it runs through another pulley block. The end of that rope then has another stainless steel clip on it. This clip attaches to a rope hawser loop , the ends of which attach to the two rear port and starboard fairleads. I will draw out a picture of the system and post it in a separate post when I get a few moments peace and quiet again.

the pulley rope (yellow floating line) attached to the anchor...this is the rear anchor ...do they call it a kedge anchor? It gets stored in a tray which is bungie clipped to the floor on the port forward well alongside the centre case. A thick 1" rubber mat goes over it and the whole lot is bungied into place so that it does not tip out in event of a capsize. I can also stand on top of it quite happily without damaging me delicate feet!


You can see how it will work. I approach Cawsand beach which is a shingle beach with a fair shelving slope on it. I drop the bow anchor about 20m out, assuming it is a rising tide, having clipped the yellow floating line shackle onto the bow eye very carefully beforehand. I then continue to motor in until Arwen’s bow gently touches the beach, the floating rope running down the port side of the boat AWAY from the slowly running engine mounted on the starboard side of the transom. Pulling up centreboard, rudder and engine, I then jump out with the stern anchor and run up the beach and bury it. I clip the shackle from the yellow floating line onto the hawser running from the transom, Push Arwen back off the beach and then I haul on the yellow rope. Now if everything works, Arwen’s bow should head back out to sea for a little distance...so that she isn’t in the small waves and broaching sideways. I can tie off the floating rope on the anchor chain on the beach and hey presto....I have a picnic stop. I keep an eye on the line, letting more out periodically. When read, I pull the rope so that Arwen comes back to the beach. I gather up the anchor and the floating rope and stow the anchor. I then pull on the floating rope to pull Arwen back off the beach. In the deeper water, down go engine, rudder and centreboard; engine is started and kept in neutral; up comes the anchor on the floating rope and it gets stowed; and then off I go!

Arwen on the drive....I'm resisting taking out the sails for winter stowage just in case the weather gives me one last day at a weekend for some sailing......but I suspect i live in hope more than possibility. It is November, the nights have drawn in, it's colder, the wind is gusty, it's wet.......I am such a wussy fair weather sailor aren't I......I should be ashamed of myself!

Well that’s the theory of Arwen's new anchor pulley explained! I’ll let you know how the reality goes asap!