Friday, 28 February 2020

Installing a small portable electric bilge pump in Arwen, a John Welsford designed 'navigator': part two

Here is my part two video.

I was hoping to include the installation into Arwen but the weather has been so bad that I haven't been able to get outside to work on her.

In addition, I am still trying to decide how to do that installation. I want to make sure that the bilge pump can be moved easily between rear and forward cockpit sections.

And, to be frank, I am apprehensive about drilling a hole through Arwen's sheer plank to fit a 'thru-deck' outlet fitting. I'm wondering whether I could just stick the hose down the forward part of the centre case instead.

Anyway, here is the part two video. Forgive my poor crimping and soldering - skills I very rarely practise........as can be seen in the video!!


I've put  links below to the other blogs in the series about installing the electric bilge pump, for those who want ore details about what I am doing and why I am doing it this way.

I know that there will be many who advocate installing a proper 12v big battery system. I use what I have at hand and am always reluctant to buy new stuff if I have something which will do the job I want done. Call it lazy sustainability. With a number of portable power-banks, a foldable solar power panel, my navionics on my tablet and my mobile phone and a huge range of camera batteries which always need recharging - and given I still actively cycle and trek and occasionally do overseas extended travel trips - I buy stuff that will cross all these activity areas - so far my charging of electronics in the boat, including VHF, has all been done successfully off small power banks and I will carry on with this. I am also looking at how I could use the new small 12v battery to charge some of these smaller devices as well.

Here are the links of the other blogs:

https://arwensmeanderings.blogspot.com/2020/02/installing-small-electric-bilge-pump-in_18.html

https://arwensmeanderings.blogspot.com/2020/02/installing-small-electric-bilge-pump-in.html

Postscript update: 

The pump base is now attached to a piece of base wood, all smoothed and varnished appropriately. Now I just need a spell of time in the boat to put in installation points. Having just been down to Looe and chatted with some inshore small boat men and seen how they have done their bilge pumps, I have decided not to drill holes in Arwen's hull. Instead the pipe will just go strait up and over the side of the coaming. There is now 'string' securely attached to the end of the bilge pipe , some 122 back and so the pipe can be quickly loosely tied to a shroud or one of the boat tent deck eyes stretched along the side coamings to hold the pipe securely in place when pump is in use.  We will review how that works first before drilling any hull holes!


Thursday, 27 February 2020

Sadly,

I have learned that I can botch up even the simplest of tasks and I therefore conclude that God placed my on the planet to do one thing - teach. I was good at teaching. The rest of life? I'm still learning!!

How not to solder wires, spade connectors and fuse holders !!

Part two video of installing an electric bilge pump in Arwen out soon.


Friday, 14 February 2020

New learning keeping reefing simple

I've been catching up on the Dinghy Cruising Association forum posts and one set on reefing caught my attention. Within a few minutes reading, several longstanding questions I'd had, got finally answered.

Stretching out my standing lug sail to sort out the new reefing arrangement

The problem of my combined topping lift/ lazy jacks was easily solved. I run a line from the aft cockpit forward to a block at the foot of the mast, where it then runs up the side of the mast to another block attached up top. From there it runs down the starboard side of the sail, through a loop eye on the base of the boom and back up the other sail side where it is tied off at the top of the mast on the port side. The sail always furls neatly between the two lines, rarely flogging or falling in the water when being raised or dropped.  When I haul the free end of the line back in the cockpit, it also acts as a topping lift, raising the aft end of the boom higher. So far, so good.

However, when putting up the boom tarp tent over the furled sail on the boom, I have to haul lots of spare line through and then grasp the two lazy jacks to move them forward along the boom so they can be tied off against the mast. I can then lay out and unfold the boom tarp tent along the entire length of the boom unhampered. It's a real pain frankly, as during a normal sailing day, I keep falling over all this surplus lazy jack/topping lift line constantly.

However, Chris, a member of the DCA,  had a far simpler idea. He has a hook on the underside of his boom and the line goes under the aft end of the boom and is retained in the aft facing hook. When he needs to set up his boom tent, all he does is furl his sail onto the boom and tie it off, then unclip the lazy jack/topping lift loop from the hook, take it backwards over the aft end of the boom and then gather it up and take it forward to the mast for tying off. No pulling loads of line through. No heaps of 'spare' line tripping him up in the cockpit during sailing. So simple...wish I'd thought of that originally. See, the benefit of joining a great organisation like The Dinghy Cruising Association - lots of really knowledgeable people who love dinghy cruising and who are willing to freely share great ideas via the DCA forum, FaceBook page or Association Journal (which by the way is one of the best small boat sailing journals out there).

Chris's simple hook arrangement into which his lazy jack/topping lift system fits


Chris's second idea relates to reefing pennants.

I have reefing pennants that are tied off in a bowline around the boom, that run up to the leech reefing cringles and then back down the other side, around a block on the side of the boom and off to a cleat at the for'ard end of the sprit boom.  I guess it is a sort of slab reefing affair, one that keeps you close to the mast during the reefing process. All well and good except that I always seem to have loops of reefing line hanging below the boom (irrespective of whether the sail is reefed or full) and which seem intent on strangling me or tearing off my hat at the first opportunity.

Chris kept his reefing simple. He runs the pennant up to the cringle, through it and then immediately has a parrel bead tied off on the pennant end on the other side of the cringle. When sail is up, the pennant is just one side of the sail. Come reefing time, he pulls on the parrel bead and down comes the leech to the first reefing point. The surplus pennant line is then ran along the boom to a cleat. Simple!

I wish I could think simple like Chris.
(In hindsight I could have rephrased that last sentence...and wish to point out I am not casting any aspersions on Chris's cognitive mental thought processes - sorry Chris!)

The green and yellow parrel beads at the leech cringles with green reefing lines running down to the boom. The first reefing pennant runs through some eyes on the boom before being tied off. The second pennant is just tied around the boom with a clove hitch and a few securing hitches on that. 

Having given this a bit of thought, I decided I would try out Chris's reefing system this season. You can see it in the photographs above and below - sort of!


Dangerously, I have made one alteration to his system. I say dangerously because long time readers of this blog will know about my ability to take the simple and complicate the hell out of it! Anyway, instead of running the surplus line to a cleat, I've dispensed with said cleat and just hitch loop the surplus line around the flapping sail bunch at the end of the boom. The parrel bead toggle is big enough to get tucked under one of the line loops and it seems to hold everything together fine (although this has yet to be tested out on the water during a blow). After freeing the toggle, I can free all the loops with just one tug.

Below shows the old system, so much string, strangling loops and complication!

What was wrong before - I couldn't detach the lazy jack/topping lift and was always being strangled by dangling excess reefing pennant. Now hopefully both will be things of the past - thanks Chris

Wednesday, 12 February 2020

Installing a small electric bilge pump in Arwen. Part 1

Thus far, I have managed to get away with having a large bucket, a kayak pump and a bailer as my emergency stuff on-board Arwen.

I have every intention of installing a Whale Gusher Urchin with removable handle along the centre case when funds permit.  In the meantime, good friend Dave very generously donated a small Whale Orca electric bilge pump to Arwen.  It is a 12V DC pump with a 1.5 amp draw and pumps 450 gph or 28/lts/min with a 1m head. 


Followers of the blog will know that I have avoided installing a large 12v battery system for powering small electronics on Arwen. Still cycling, camping and travelling, I buy equipment that will cross sports. Thus I went for a series of small power banks and a Solar panel system for recharging and powering up my VHF radio and camera battery equipment and gimbals.

So why install a small electric bilge pump?


  • to pump out rain

    water that cascades off the sails during showers and collects along various points throughout the cockpit
  • to pump out the rainwater that leaks through Arwen's tarpaulin and collects against the front thwart bulkhead (the drive is steep sloped). 
  • to have a movable system which can be put in forward or rear cockpit sections as necessary
So, what is the set up I am going to attempt? Well its a idea shamelessly stolen from kayakers and open canoeists.....a small 12V 7amp battery in a box with associated wiring and switches and a pump that can be moved about. The box and pump on its plywood base can be placed under bungee straps that will adorn front, centre ad stern thwarts and also at various corners of the forward and aft cockpit areas. 

It is always difficult trying to sail and use the kayak pump during a shower - so hopefully this system will make things easier.  Below is a list of the components and a simple wiring diagram (forgive my poor drawing skills). There will be a video telling the story of the installation later on this spring. 

The components:

  • a sealed lead acid Yuasa rechargeable battery 12V 7amp
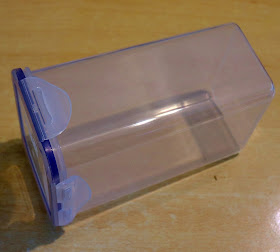
  • a Lock n Seal plastic box
  • one 12v on-off switch
  • 1 thru-hull fitting - 3/4" internal diametre
  • a length of smooth bore, reinforced plastic pipe 3/4" internal diametre - I avoided corrugated pipe as it can reduce discharge rates by up to 30%
  • a 2 amp fuse and in-line fuse holder
  • the Whale Orca 500 pump
  • a piece of 9mm plywood which will be varnished and act as the base for the strainer to be screwed to
  • various spade and butt connectors
  • several lengths of heat shrink tubing
  • a small 12V battery charger 


The wiring diagram:


Of course, people who know me well will tell you that I have no idea what I'm doing most days. so, this will be an interesting experiment! I really have no idea whether its a good idea or not; or whether it will work or not; but nothing ventured, nothing gained.  'You don't know what you don't know' and 'necessity is the mother of all invention'. 

The intention is to put the battery, fuse and switch inside or on top of the box. I know that a lead acid sealed battery can still vent hydrogen and therefore should never be put in a sealed box. Consequently, I need to find a way of venting the box whilst minimising possible water ingress. I have no idea on this issue so if any readers do - please drop me a comment in the box below.