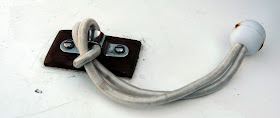
Got lots done today. Managed to fix eye straps under side decks and around the hull sides. Put in bungee cord - so now buckets, fenders etc are securely stored and not rattling around.
The netting across the port front thwart installed last weekend.
Behind here goes spare anchor, fuel cans
The anchor 'bin' goes in front of the bucket area
The hanging ropes are the starboard shroud
Put in my waterproof plastic white barrel - it holds food on extended voyages.
The barrel on the background
In the foreground is the centreboard - needs some touching up around that shackle area
Re-rigged the jib and sorted out the furler.
This is a Barton roller furler and it is brilliant - never once failed me
The ballast tapes are sorted comprising webbing and clip buckles.
Hopefully these will keep ballast sacks in if Arwen goes over!!!
Managed to sort out the reefing system and installed another reefing line...so now I can put in two reefs if need be.
And that is it. Arwen is on the drive and the sails are in ready....all we need now is another nice weekend and we shall be out practicing man over board; coming alongside and picking up and leaving moorings.
All packed minus anchors etc
She's a lot more ship-shape that she was a few months ago
I took some other shots of Arwen whilst she was out in the spring sunshine
the bottom part of the transom - from left to right; a fold down brass step to aid re boarding; the fish finder transducer which doubles as a depth recorder; the lower rudder pintles with a rudder lock strip above
Arwen's transom arrangement with the home made outboard bracket
Side deck arrangement: shroud rope (dyneema)
Behind that is one of the oar bungees which hold oars to front deck
Jib sheet blocks (fixed)
Little white deck eyes through which go the furler 'string'
On top of the centre case we have.....from left to right
The 'bung in a hole'.....comes with broom handle piece so if centreboard becomes jammed......down the hole goes the handle and.......
then we have the big 'black eyes' - through which go each of the jib sheets when I am solo sailing - it makes sure I'm pulling the right sheet and it helps tidy them up in the cockpit.
Finally there is the cleat into which I place jib sheets when solo sailing
This is the forward end of the block and tackle which forms the rudder up haul
The down haul (blue/white rope); below the mast - left hand side is block for jib halyard
Right hand side is block for main halyard
The black cleat is where the jib halyard gets tied off
One of the oar retainers - they work really well and allow the oars to be stored on the deck with the handle ends up against the bowsprit
Really looking forward to get onto the water soon
Steve


Thanks for a fantastic and very detailed post Steve. I really enjoyed looking at the very specific details of your set-up...and I'm glad you had an enjoyable day getting sorted after the shocks you uncovered from under the tarps!
ReplyDeletethank you
ReplyDeleteI'm no craftsman and she looks battered around the edges now - after this season - I think we will go for a complete re-varnish and re-paint - Arwen will be six years old then.
It never ceases to amaze me hwo we all go about building this boat with tiny variations in hull and main structure; and some whopping variations in rigging and set up. I guess if it works for you....then go with it.
Your boat is coming along nicely and looking superb in all areas - well done Robert. Good to hear from you - hope the book sales are going ok - take care
Steve